The official documentation explains the basics of integrating Google’s in-app billing, but many challenges arise during implementation. This article outlines the key processes and core technical points for integrating Google Payments, along with important considerations.
1. Enabling Billing Features in Google Play Console
Set up payment details in Google Payments Center, then link this information to your Google Play developer account.
Upload the app: To configure in-app purchases or subscriptions, submit an AAB that includes the Billing Library for Google’s review. Upload it to the internal testing version.
2. Creating and Configuring In-App Products and Subscriptions
Google offers two types of payment products: In-App Purchases (INAPP) and Subscriptions (SUBS). Creating these in Google Play Console follows similar steps. For each product, you must provide a unique Product ID, name, description, and pricing information. Subscriptions require additional details, such as whether the basic plan is auto-renewable or prepaid.
Log in to the Google Play Console, go to Products > Subscriptions, and click "Create Subscription."
Enter the Product ID and subscription name, then click "Create."
Add subscription details: benefits, description, tax rates, and product categorization.
Add a base plan: set a base plan ID, choose the subscription type, set countries and prices, and click “Enable.”
Add promotions based on the base plan, e.g., a 3-day trial. Configure a promotion ID, applicable regions, and eligibility criteria, then click “Enable.”
Preview the subscription plan structure to verify your configuration.
3. Setting Up Google Cloud Pub/Sub
Create a Google Cloud Project and enable the required APIs and services.
Link the Google Cloud Project with the Google Play Console.
Create a Service Account in Google Cloud.
After creating the account, generate and download the JSON key for the server-side team.
Return to the Google Play Console, add the Service Account in “Users and Permissions,” and assign permissions.
Enter the account in Google Play Console. You can now use the Service Account’s key information to call the Google Play API.
In Google Cloud Pub/Sub, create a topic and subscription.
Grant permissions to a fixed service account:
google-play-developer-notifications@system.gserviceaccount.com.Enable real-time notifications in Google Play and configure the topic created in Google Cloud.
Send a test notification to verify that you can pull messages from Pub/Sub.
Once verified, change the subscription type to push so notifications can be sent to your service via HTTP.
4. Validating Purchase Tokens and Handling Callbacks
Getting Ready for Coding
Import dependencies:
<dependency>
    <groupId>com.google.auth</groupId>
    <artifactId>google-auth-library-oauth2-http</artifactId>
    <version>1.19.0</version>
</dependency>
<dependency>
    <groupId>com.google.apis</groupId>
    <artifactId>google-api-services-androidpublisher</artifactId>
    <version>v3-rev20231115-2.0.0</version>
</dependency>
Configure the setup:
google-play.packageName=com.xxx.xxx
google-play.serviceAccountJson=xxxxx.json

@Data
@Configuration
@ConfigurationProperties(prefix = "google-play")
public class GooglePlayConfig {
    private String packageName;
    private String serviceAccountJson;

    @Bean
    public GoogleCredentials googleCredentials() throws IOException {
        return GoogleCredentials.fromStream(new ClassPathResource(serviceAccountJson).getInputStream())
                .createScoped(AndroidPublisherScopes.ANDROIDPUBLISHER);
    }

    @Bean
    public AndroidPublisher androidPublisher(GoogleCredentials credentials) throws IOException, GeneralSecurityException {
        return new AndroidPublisher.Builder(
                GoogleNetHttpTransport.newTrustedTransport(),
                GsonFactory.getDefaultInstance(),
                new HttpCredentialsAdapter(credentials)
        ).setApplicationName(packageName).build();
    }
}
Verification Logic: Checking the validity of the purchase.
@Component
@Slf4j
public class GooglePlayComponent {
    @Resource
    private GooglePlayConfig googlePlayConfig;
    @Resource
    private AndroidPublisher androidPublisher;

    public ProductPurchase productPurchase(String sku, String purchaseToken) {
        try {
            return androidPublisher
                    .purchases().products()
                    .get(googlePlayConfig.getPackageName(), sku, purchaseToken)
                    .execute();
        } catch (IOException e) {
            log.error("Failed to query product purchase. {}", purchaseToken, e);
            ServiceException.throwInternalServerEx("Failed to query product purchase:" + purchaseToken);
            return null;
        }
    }
}
Finally, handle the callback:
@PostMapping("/google_play_webhook")
public Object googlePlayWebhook(@RequestBody String body) {
    log.info("Google play subscription webhook: {}", body);

    if (StringUtils.isBlank(body)) {
        log.warn("Google play subscription webhook body is EMPTY");
        return ResponseEntity.status(400).body("Empty body");
    }

    DeveloperNotification developerNotification;
    try {
        developerNotification = JacksonUtils.parseJson(body, DeveloperNotification.class);
    } catch (Exception e) {
        log.error("Failed to parse body. {}", body, e);
        return ResponseEntity.status(400).body(e.getMessage());
    }

    // TODO: Handle processing

    return ResponseEntity.ok().body("OK");
}
5. Testing Payments
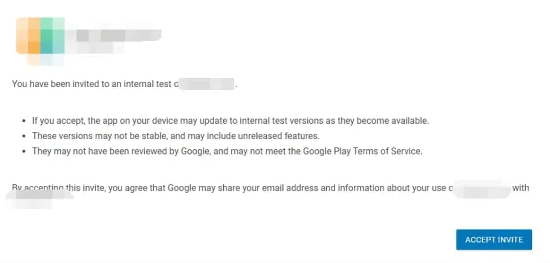
Publish the test AAB to internal testing and add the tester’s Google account.
Share the link with the tester, who can then accept the invitation to start payment testing.


