Before diving into Docker orchestration, let's first understand Docker technology itself. Docker is an open-source platform designed to help developers automate the deployment, scaling, and management of applications. Since its launch in 2013, Docker has rapidly become an essential tool in modern software development and operations.
Docker uses container technology to package applications along with all their dependencies, ensuring consistent execution across different environments. Compared to traditional virtualization technologies (such as virtual machines), Docker containers are more lightweight and have significantly shorter startup times. This advantage allows developers to develop and test applications more efficiently, especially in fast iteration and frequent release scenarios.
With the rise of the DevOps movement, the boundary between development and operations has become increasingly blurred, and Docker provides strong technical support for this shift. However, as project scales grow and complexity increases, the number of Docker containers also rises, leading to the need for Docker orchestration.
Docker orchestration refers to the tools and techniques for managing and coordinating multiple Docker containers, with the main goal of simplifying the deployment, scaling, and management processes of containers. Through orchestration, users can more easily manage complex application architectures, ensuring that various components can work efficiently together.
Therefore, this article will provide a practical guide for deploying a Docker orchestration project from scratch, helping you master this crucial technology and enhance application management efficiency and flexibility.
Project Preparation
In this section, we will take a Java project as an example, assuming that you already have a project with a microservice architecture. The overall project structure might look as follows:
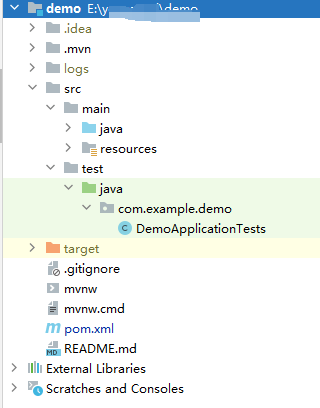
Next, we will start building Docker containers step-by-step and follow a series of systematic steps to achieve this process.
Core Concepts
We will first explain some basic concepts in detail, including Dockerfile, Docker build command, and the basic introduction of the docker-compose.yml file. Once these concepts are understood, we will move on to the practical part to deepen your understanding through practice.
Dockerfile
A Dockerfile is a text file containing a series of instructions needed to build a Docker image. These instructions define the base environment of the image and detail the steps for installing applications, required dependencies, configuring environment variables, and other necessary settings. For example:
# Use a base image
FROM maven:3.8.3-openjdk-17 AS builder

# Set the working directory
WORKDIR /app

# Copy the pom.xml and source code
COPY pom.xml .
COPY src ./src

# Build the project
RUN mvn clean package

# Use a lightweight base image to run the application
FROM openjdk:17-jdk-slim

# Set the working directory
WORKDIR /app

# Copy the JAR file from the build stage
COPY --from=builder /app/target/demo-0.0.1-SNAPSHOT.jar ./myapp.jar

# Set the command to execute when the container starts
ENTRYPOINT ["java", "-jar", "myapp.jar"]
Next, we need to apply this configuration to our project. For demonstration purposes, we used a custom file name to start the project to clearly show each step of the process. Of course, you can choose to use the default file name, making the operation simpler and more direct. The final effect is the same. As shown below:

Build Command
The docker build command is the core command for building Docker images, used to convert the instructions defined in a Dockerfile into an executable image. When running this command, you can use a series of optional parameters to better customize the build process.
docker build [OPTIONS] PATH | URL | -
PATH: Specifies the context path containing the Dockerfile, usually the current directory (
.) or a specific directory path.URL: Can be the URL of a Git repository, from which Docker will fetch the Dockerfile.
-: Indicates reading the Dockerfile from standard input.
Common options include:
-t, --tag: Specifies a name and tag for the image, e.g.,-t myapp:latest.-f, --file: Specifies the path to the Dockerfile.--no-cache: Ensures each step runs from scratch without using the cache.--target: If the Dockerfile defines multi-stage builds, this option specifies the target stage to build.
docker-compose.yml File
The docker-compose.yml file is a configuration file used to define and run multiple Docker containers, simplifying the management of application services, networks, and data volumes. This simple YAML file allows you to describe the entire application's architecture in a unified configuration, making container startup, stopping, and management straightforward. In our sample program, we included a MySQL service.
Although we already have an independent MySQL instance locally, to better demonstrate how to run multiple Docker containers simultaneously, we chose to start MySQL as a Docker container. Notably, MySQL has an official pre-built image, which means we don't need to spend extra effort building and configuring the database; we can directly use an existing image.
Now, let’s start this process!
version: '3.8'services:
  app:
    image: ccr.ccs.tencentyun.com/studiousxiaoyu/my-java-app:latest  # Replace with your Java application image
    ports:
      - "18080:18080"  # Port mapping
    environment:
      SPRING_DATASOURCE_URL: jdbc:mysql://db:13306/agent?useSSL=false&serverTimezone=UTC&useUnicode=true&characterEncoding=utf-8
      SPRING_DATASOURCE_USERNAME: user
      SPRING_DATASOURCE_PASSWORD: password

  db:
    image: mysql:5.7  # Use MySQL 5.7
    environment:
      MYSQL_ROOT_PASSWORD: root_password  # Set the root password
      MYSQL_DATABASE: agent  # Create a database
      MYSQL_USER: user  # Create a new user
      MYSQL_PASSWORD: password  # New user password
    ports:
      - "13306:13306"  # Map MySQL port
    volumes:
      - db_data:/var/lib/mysql  # Data persistencevolumes:
  db_data:  # Define a data volume
You can start all the services defined in the docker-compose.yml file by running the docker-compose up command.
Start Building
Assuming we have successfully deployed the code project from the repository to the server, we can now proceed to operate on the server. If you haven't installed Docker yet, you can install it yourself, which is not complicated.
Once installed, simply go to the root directory of the project and execute the appropriate command to start using it.
docker build -t my-java-app -f demo.dockerfile .
The specific steps and processes of the build are shown below:
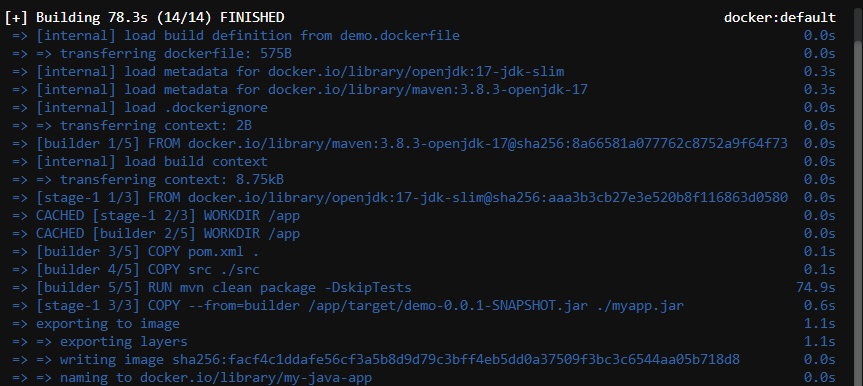
We can patiently wait for the following steps to complete, as this process closely resembles the production environment. Next, we just need to push the final built image to our private repository for subsequent deployment and management.
Image Repository
Of course, the company's private repository address is indispensable. Here, we use Tencent Cloud’s Container Registry Service as an example to show how to store and manage the image.
Pushing to Private Repository
We have previously detailed the steps for creating a private repository, so we will not repeat them here. Now, we can directly push the built image to the repository for further use and management.
Next, we tag our image, and after completing the tagging, we push the image to the private repository for subsequent deployment and use.
sudo docker tag my-java-app:latest ccr.ccs.tencentyun.com/studiousxiaoyu/my-java-app:latest
sudo docker push ccr.ccs.tencentyun.com/studiousxiaoyu/my-java-app:latest
Successful push as shown below:

Container Orchestration
Next, we will use an orchestration file to define and manage the required services. To achieve this, we need to create a file named docker-compose.yaml in the specified directory. The content of this file will be consistent with the configuration we previously displayed.
After creating the file, we will directly execute the startup command to verify our configuration and check if each service starts smoothly.
docker-compose -f spring-ai.yaml up -d

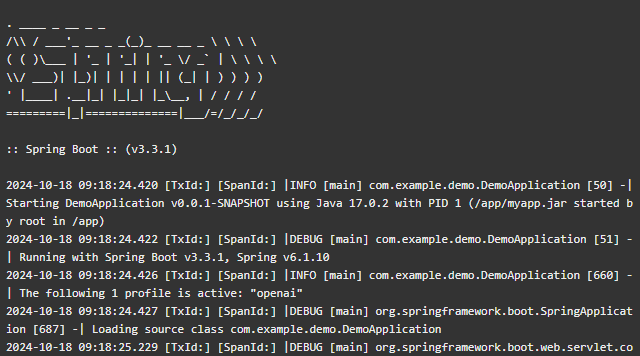
Lastly, check the logs, and we successfully started:
Conclusion
In this article, we explored Docker's core concepts and the importance of its orchestration technology. From Docker's lightweight container architecture to its application in modern DevOps environments, Docker not only improves development and deployment efficiency but also makes multi-container management more efficient. We introduced Dockerfile, build commands, and the usage of the docker-compose.yml file step by step, helping readers learn how to build and manage microservice architectures.
In practical operation, we took a Java project as an example and guided through a practical demonstration showing how to build and deploy Docker containers in a local environment. As project scales increase, mastering Docker orchestration becomes crucial; it simplifies container management processes and enhances application flexibility and scalability. We hope the guide provided in this article helps you.
