Today, we will dive deep into a powerful Java automation testing tool—Selenium WebDriver. Before formally introducing Selenium WebDriver, let's first provide a brief overview of Selenium itself to better understand its background and features.
Official learning website: https://www.selenium.dev/
Selenium is an open-source automation testing framework, with WebDriver as one of its core components. Unlike the traditional Selenium RC, WebDriver communicates directly with the browser, offering more efficient and flexible testing capabilities.
Selenium WebDriver is a robust tool used for automating the testing of web applications. It can simulate various user interactions within a browser, such as clicking, typing text, selecting dropdowns, and more, to validate the functionality and performance of applications.
Multi-browser support: WebDriver supports multiple popular browsers, including Chrome, Firefox, Safari, and Edge, allowing tests to be verified across different environments.
Programming language support: WebDriver offers bindings for multiple languages, such as Java, Python, C#, and Ruby, enabling developers to write tests in their preferred language.
Native operation support: WebDriver can interact with a browser’s native functions, such as window management and JavaScript execution, to better simulate user behavior.
Page Object Model (POM): The Page Object Model allows page elements and operations to be encapsulated into classes, improving code maintainability and readability.
In simple terms, the core objective of writing test code is to control the driver to perform specific actions. If you've ever written web scraper code, you'll find similarities in the flow control between the two. During testing, we need to identify elements to be located and then write code to make the browser perform corresponding actions like clicks, achieving automated testing.
This process is similar to how a web scraper gathers page information, but the goal here is to validate functionality rather than extract data.
Environment Setup
Let’s jump right into a simple starter project to experience how to use Selenium for browser automation.
Java Environment:
To use the Selenium framework with Java, you first need to ensure the JDK environment is installed locally. This is fundamental for Java development. If you're using an integrated development environment (IDE), most IDEs will automatically handle JDK dependencies. This project will use JDK 17 for demonstration purposes.
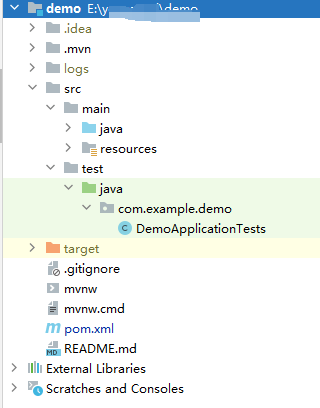
Maven Project:
Add the corresponding dependency to the pom.xml file:
<!-- https://mvnrepository.com/artifact/org.seleniumhq.selenium/selenium-java -->
<dependency>
    <groupId>org.seleniumhq.selenium</groupId>
    <artifactId>selenium-java</artifactId>
    <version>4.25.0</version>
</dependency>
In Java development, JDK and IDE are both very common and essential tools, so we won't cover detailed installation and usage tutorials here. Instead, we’ll focus directly on the practical application of Selenium to better understand its functions and advantages in automated testing.
Browser Driver:
Typically, the above steps are sufficient. However, some may mention needing to download the appropriate browser driver. Although I haven’t specifically covered this part here, it can still run smoothly. For easier future reference, it's recommended that you create a checklist to quickly find related information when needed.
Selenium 3 Browser Driver Downloads:
Simple Selenium Example
Next, we will demonstrate how to open Baidu and perform a search. To clearly explain the process, below is a simple example code:
public class BaiduSearch {
    public static void main(String[] args) {
        // 1. Create a WebDriver instance
        WebDriver driver = new EdgeDriver();
        // 2. Open Baidu's homepage
        driver.get("https://www.baidu.com");
        // 3. Locate the input box and enter 'selenium'
        driver.findElement(By.id("kw")).sendKeys("selenium");
        // 4. Locate the 'Baidu Search' button and perform a click
        driver.findElement(By.id("su")).click();
        // 5. Close the browser
        driver.quit();
    }
}
Demonstration Effect
Under normal circumstances, the system will automatically launch a corresponding browser window for subsequent operations.

Great! We’ve now successfully gotten started and can proceed with more personalized operations. This lays a solid foundation for our future use. If we have time in the future, we can further explore and study more features and techniques to fully unleash the potential of this tool, enhancing our operational experience.
Conclusion
In today’s discussion, we delved into Selenium WebDriver, a powerful Java automation testing tool. From basic concepts to practical applications, we emphasized how WebDriver interacts directly with browsers, providing efficient and flexible automation testing solutions. Through example code, we demonstrated how to quickly set up an environment and conduct a simple Baidu search operation, ensuring that everyone can grasp the basic usage.
As our understanding of Selenium deepens, future explorations will focus on its advanced features, such as optimizing test cases and automating complex scenarios. We look forward to applying these techniques more effectively to enhance our automation testing capabilities in the future.


