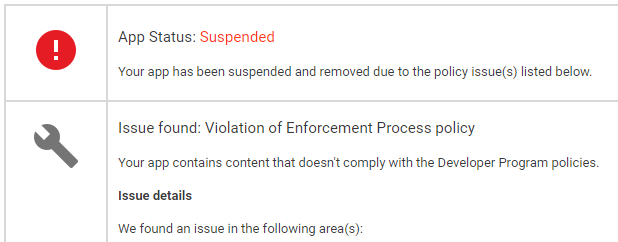
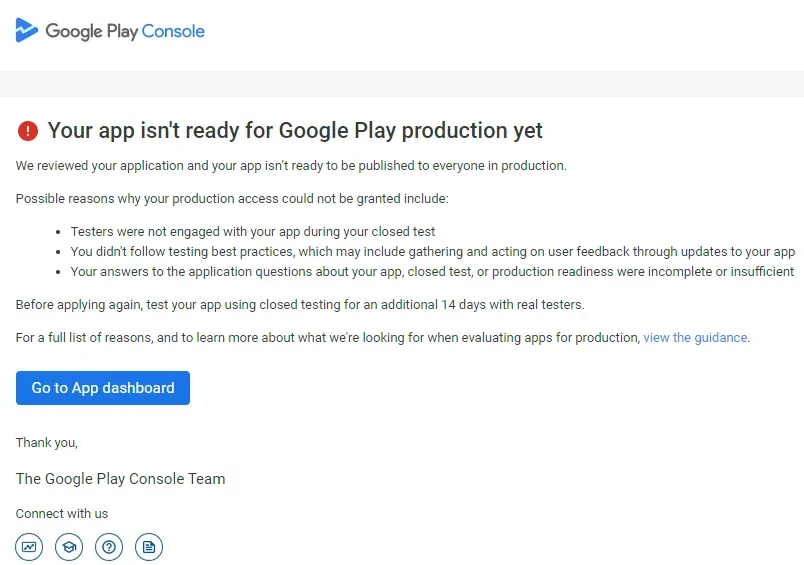
As we know, starting from November 13, 2023, any new Google personal developer account must have 20 internal testers conduct a closed test of the application for at least 14 days before the application can be submitted for review to the official version. I believe everyone here finds this policy by Google quite frustrating. After two months of effort, I finally succeeded on the third attempt; no one can understand the hardships I've gone through! I want to emphasize my approach to breaking through this barrier: listen to Google, follow their requirements, respect platform rules, and build mutual trust, and Google will rarely make things difficult for you. There are many service companies out there offering "20+14" closed testing, but I won’t recommend any here. It's hard to discern their credibility, and while spending a little money may seem trivial, the associated risks are significant—after all, your app is like your own child.
The following sections will outline the key processes of the closed testing track and the core points to note throughout the testing phases (a friendly reminder: if you’re a beginner, I recommend reading through to the end; those looking for the essential information can skip directly to section six). I hope this helps you successfully navigate the "20+14" closed testing process.
1. Creating a Closed Test
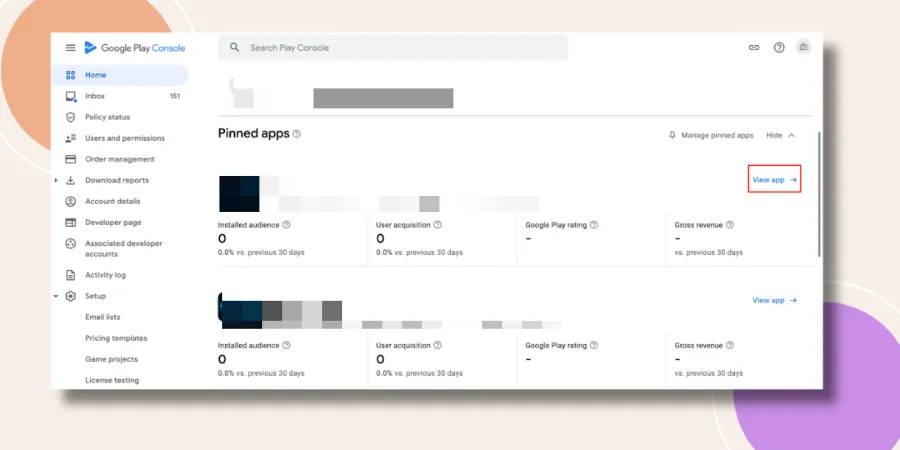
Log in to your Google Play Console and click on the “View Apps” option.
In the left sidebar, under the "Release" section, click on "Testing" > "Closed Testing."
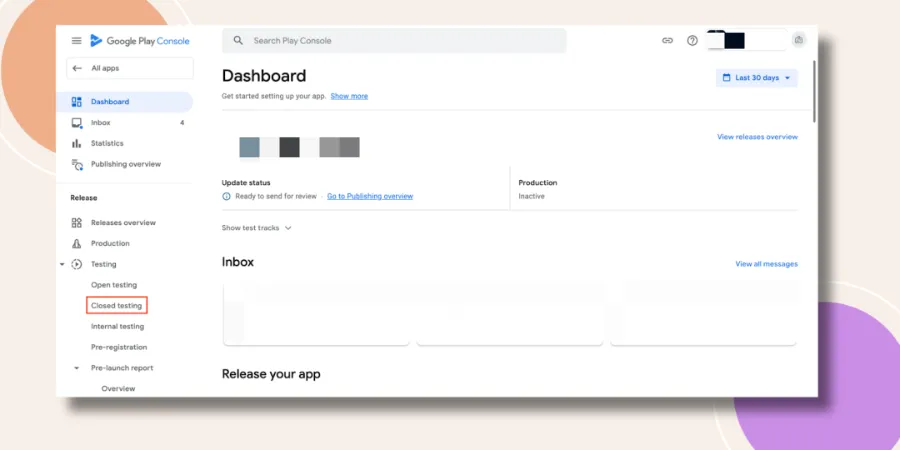
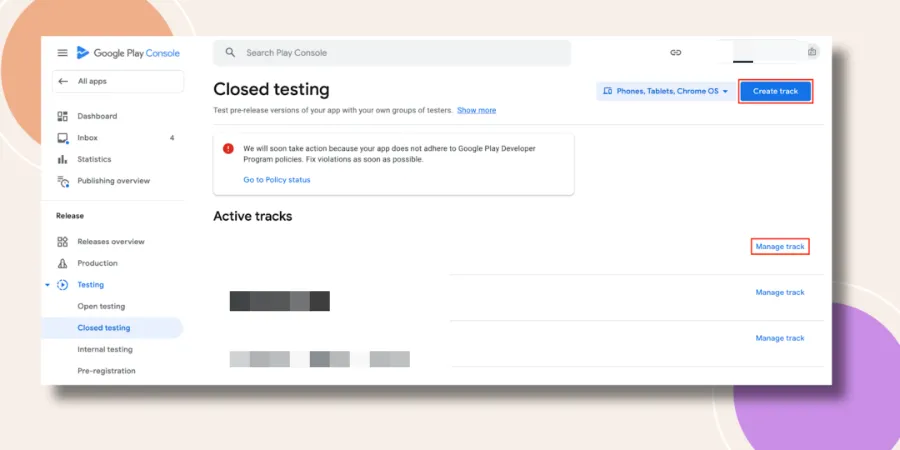
After clicking on "Closed Testing," you need to select from the "Active Tracks." If a track already exists, simply click on "Manage Tracks." If you want to run multiple tests, you can click on "Create Track."
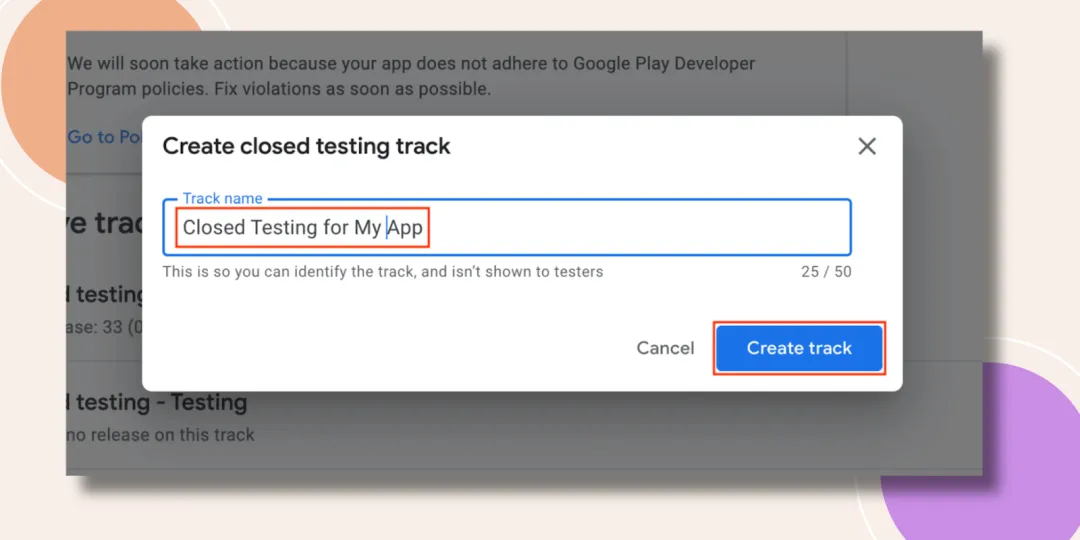
Fill in the test name and click "Create."
If this is your first time uploading a version to the test track, you may need to agree to Google’s terms before proceeding.
2. Setting Up the Closed Testing Track
The closed testing track allows app developers to invite individuals or user groups to test before submitting the app for release. It helps to fix bugs, ensure compatibility, improve user experience, and enhance the overall quality of the app based on feedback from a limited audience.
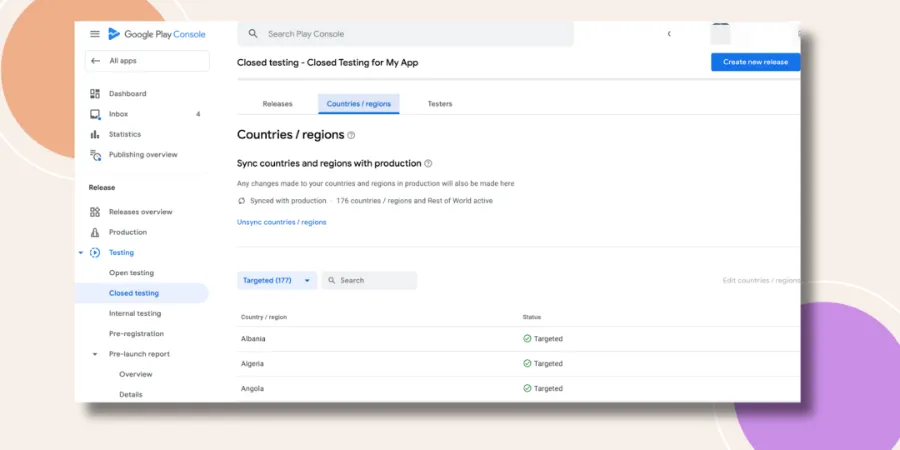
Click on the “Countries” option, then click “Add Countries.”
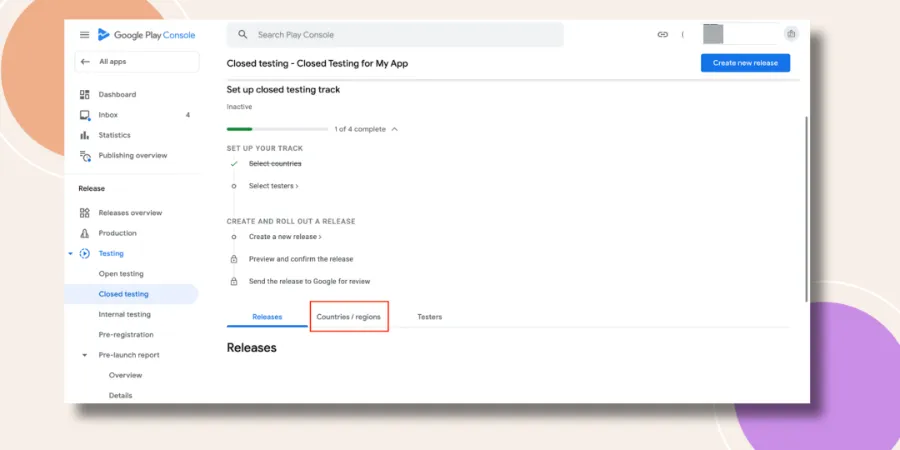
Select the countries/regions where you wish to publish the app.
3. Adding Testers to Test Your App
In the Google Play Console, adding testers involves inviting specific users to participate in closed or open testing of the app. For closed testing, developers can add testers by entering their email addresses or sharing an invite link. Testers will receive an invitation to try out the app and provide feedback, helping developers identify and resolve issues before release.
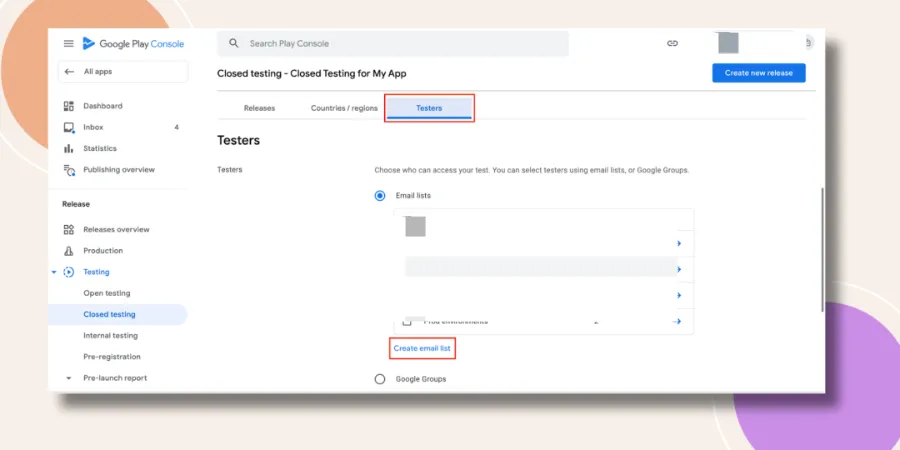
Click on the “Testers” option and select the email list. You can also use the “Create Email List” option to add more email addresses.
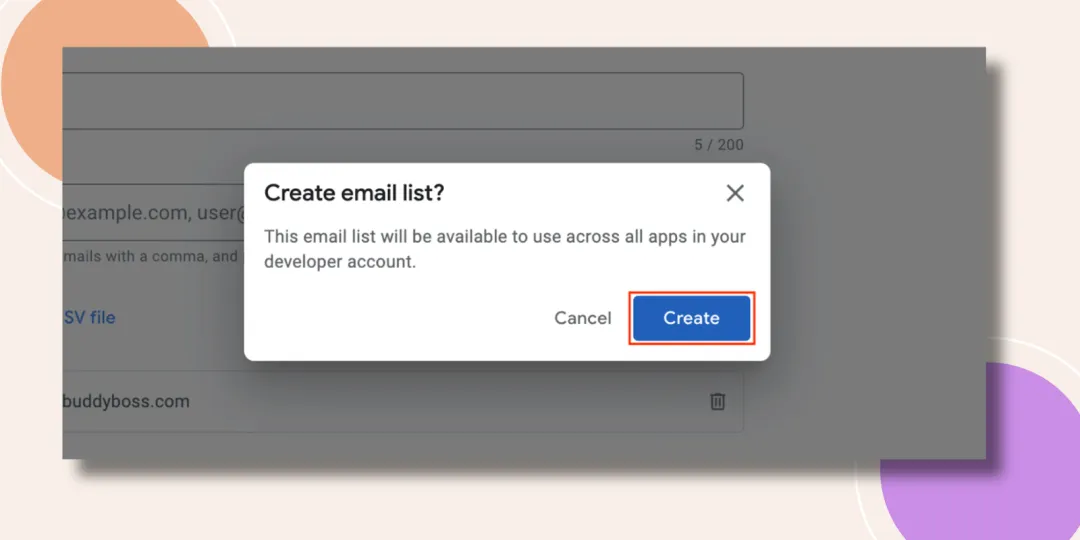
As part of the new policy for closed testing, you need to have 20 testers opt in to the test; click the "Create" button.
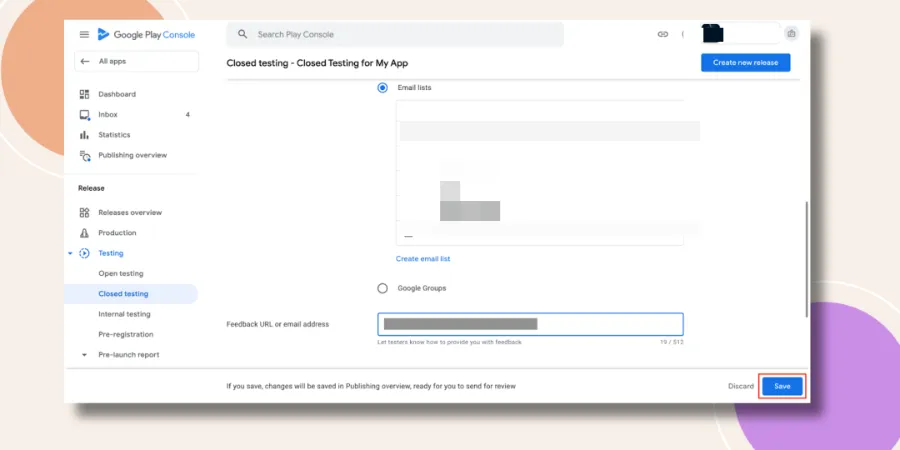
Review the added email list. Add your email address in the feedback URL so that testers can share their opinions with you. Click the save button, and a pop-up will appear; click on the overview button.
Copy the link to share with testers. The testing link will only be available once Google has completed and approved the submission; otherwise, the copy link option will be grayed out and unavailable.
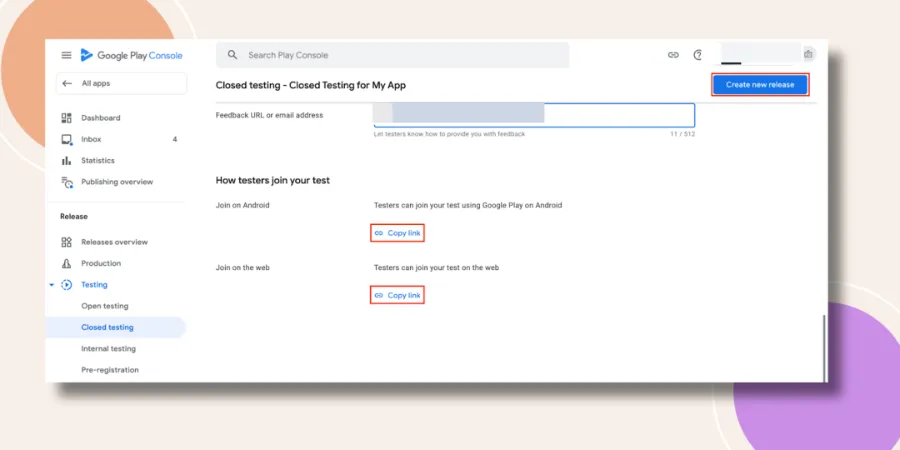
4. Creating a New Version
Build the AAB package for the test version or add it from the library.
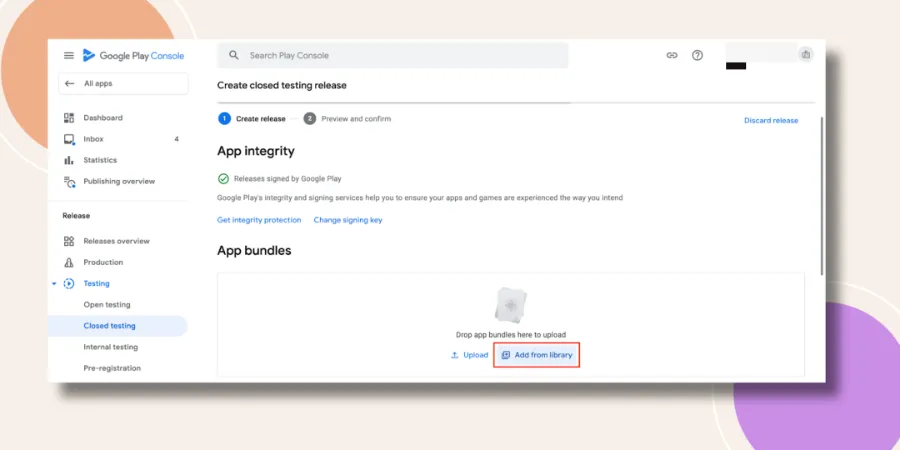
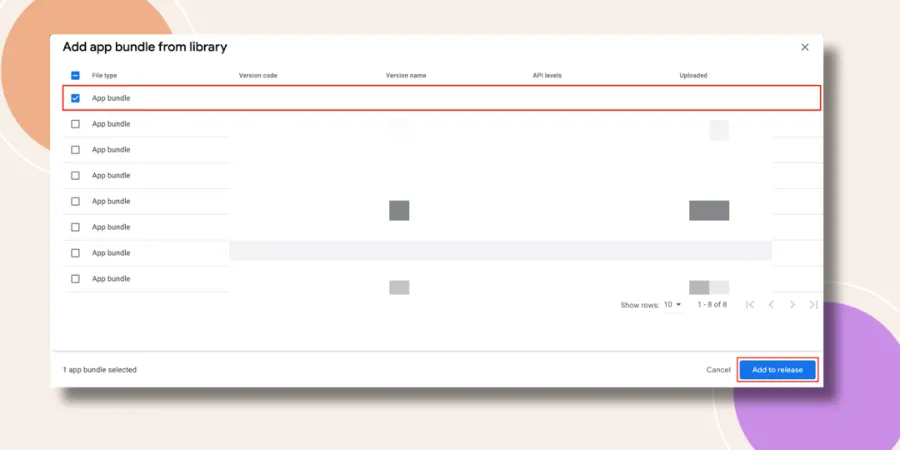
Select and press the "Add to Release" button.
The system will auto-fill the app’s version number; manually enter the version description. Click the “Next” button.
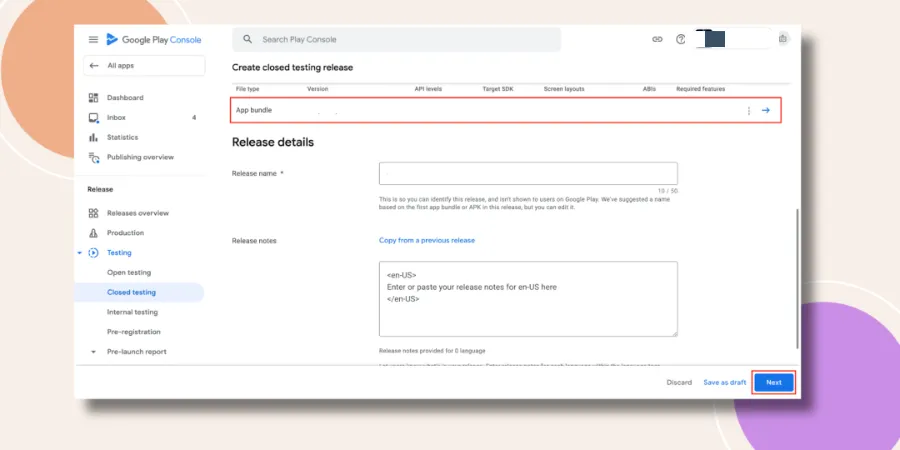
Then click the "Save" button.
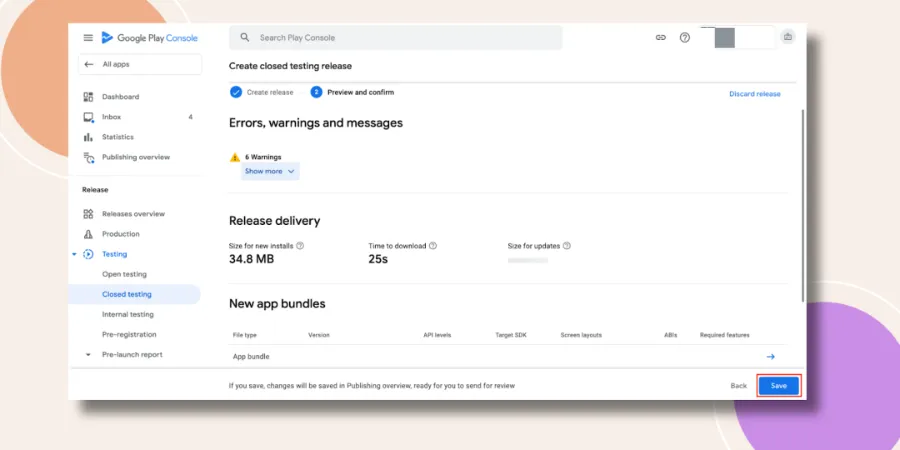
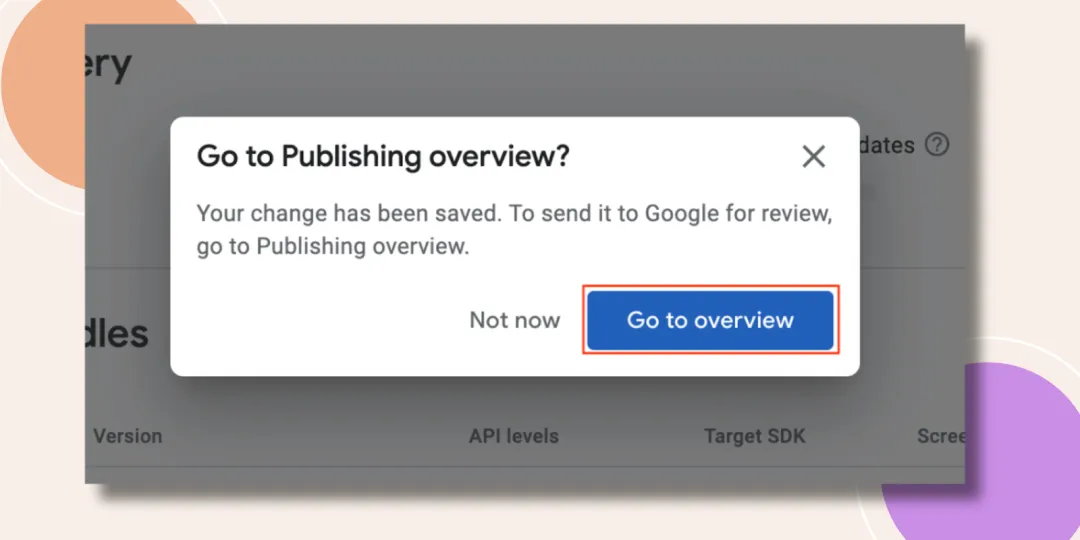
Now, in this pop-up window, click the jump to overview button.
Click “Submit Changes for Review.”
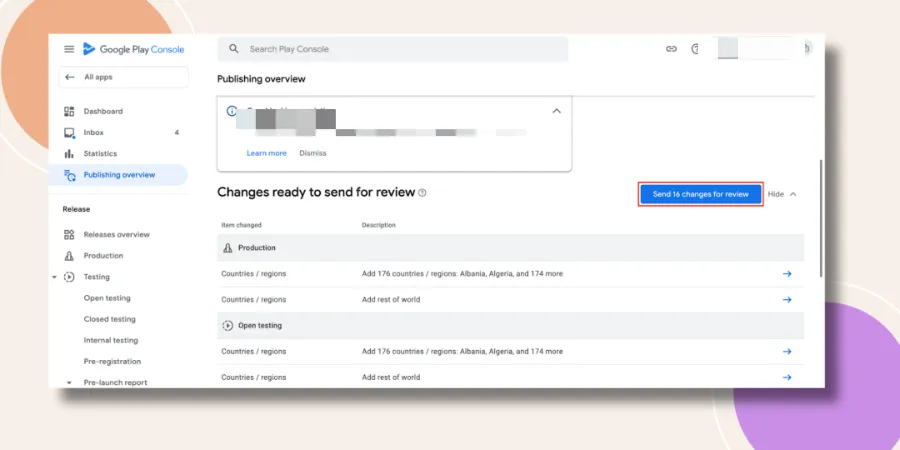
After the pop-up, just press the “Send Changes for Review” button. You’ll need to wait 3-7 days for Google to approve your app.
5. License Testing
License testing in the Google Play Console is crucial for validating app licenses, preventing unauthorized use, and protecting revenue and intellectual property. This step ensures that only legitimate users who have legally purchased or downloaded the app can access it.
While waiting for app review, you can continue to the next steps. Navigate back to all apps at the top of the left sidebar.
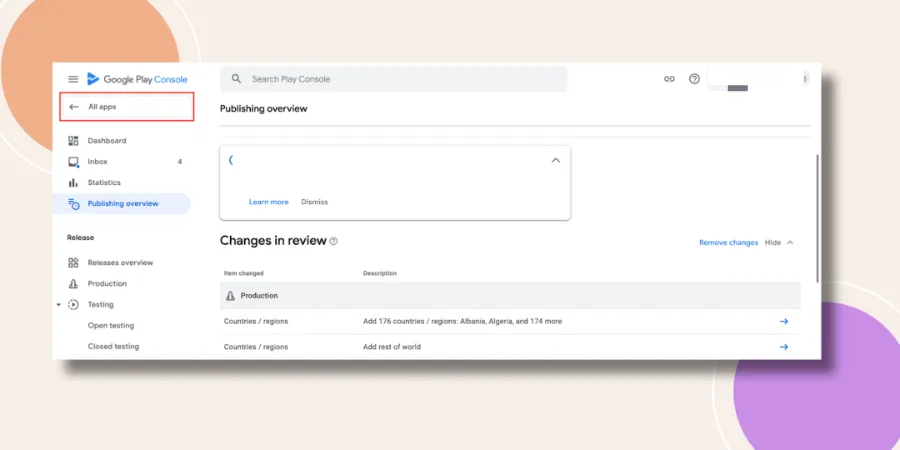
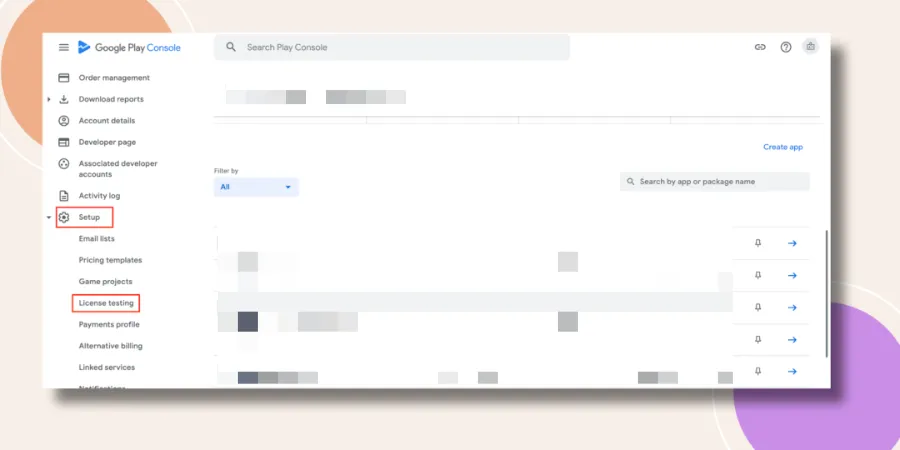
Under "Settings" in the sidebar, click "License Testing."
Select license testers from the email list, then click the “Save Changes” button.
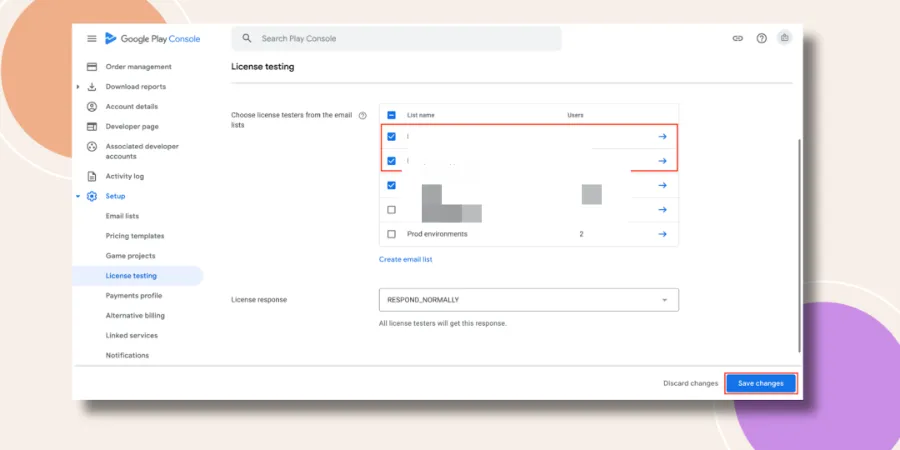
Click “Save,” and at this point, the app can undergo closed testing through Google.
Once the release is approved, share the link with testers so they can start testing. After 20 testers have tested the app for 14 consecutive days, you will qualify to submit the official version.
6. Key Points: Improve the Pass Rate for the "20+14" Closed Testing
Now we get to the core content. Let’s get straight to the key points!
1. Preparing for the "20+14" Closed Testing Phase
20 Google Test Accounts (also known as nurturing accounts)
Try to use accounts that have been registered for a while and have had significant browsing interactions within the Google ecosystem, or those that frequently access certain apps on Google Play. These accounts will have higher credibility and appear more authentic, making it easier to gain Google’s trust.
20 Testers’ Devices and Network Environment (Avoiding Association)
How to avoid association? I previously highlighted this in my article “Cried Again, Why Was My Google Developer Account Suspended?” For those who want a refresher, you can check it out. Use 20 real mobile devices and 20 independent networks to avoid triggering Google’s association detection, though this can be challenging for most individual developers. If using cloud mobile devices, I recommend: overseas public cloud > domestic cloud devices. The reasoning is clear.
2. During the "20+14" Closed Testing
Testers’ Operating Standards (Continuous + Authentic + Interactive + Feedback)
These four terms summarize the "20+14" closed testing process. So, how should this be done?
During the 14-day testing period, testers must log into the app via the link every day.
Testers must simulate real user experiences while navigating through the app.
Testers should provide appropriate feedback on the testing product; if they encounter bugs, they must submit them to the developer. The developer should respond actively to this feedback. In the Google backend, the response path is: Quality >> Ratings and Reviews >> Testing Feedback.
Developers’ Operating Standards (Version Updates)
Take any feedback received seriously and respond to it. Based on user suggestions, build a new AAB file for version updates and increment the version number. This approach is easy to understand; if you don’t inform Google that you’ve made changes to the application based on feedback, they won’t believe that anyone has truly tested it.
3. After the "20+14" Testing Ends
Google Questionnaire (Telling a Story)
At the end of the testing, there will be a questionnaire. It’s advisable to provide real and detailed testing content when filling it out. You can emphasize communication and interaction with testers, the process of discovering and fixing issues, etc., to demonstrate your commitment to improving app quality. (This is where you need to showcase your writing skills and convey to Google’s reviewers your journey over the past ten days.)
Conclusion: Be Practical and Realistic to Break Through!
In a nutshell, once you’re in the game, there’s no turning back. You should strictly follow Google’s requirements for testing and never be perfunctory. Engage in more interaction and feedback with your product and testers, showcasing a positive attitude. By doing well in each of the steps outlined above, you will gain more trust from Google, and you will definitely break through!
Recently, I've heard this saying: personal accounts that pass the "20+14" closed testing may even be more stable than enterprise accounts. This claim still needs further investigation, but one undeniable point is that personal accounts have simpler registration processes and lower maintenance costs. So regardless of how everyone decides, the bottom line is that passing the test is impressive!

