29.1 LayoutBuilder
With LayoutBuilder, we can access the constraints information passed by the parent component during the layout process, allowing us to dynamically construct different layouts based on these constraints.
For example, we can implement a responsive Column component called ResponsiveColumn, which displays its child components in a single column when the available width is less than 200, and in two columns otherwise. Here’s a simple implementation:
class ResponsiveColumn extends StatelessWidget {
  const ResponsiveColumn({Key? key, required this.children}) : super(key: key);

  final List<Widget> children;

  @override
  Widget build(BuildContext context) {
    // Use LayoutBuilder to get the constraints from the parent and check if maxWidth is less than 200
    return LayoutBuilder(
      builder: (BuildContext context, BoxConstraints constraints) {
        if (constraints.maxWidth < 200) {
          // If maxWidth is less than 200, display in a single column
          return Column(children: children, mainAxisSize: MainAxisSize.min);
        } else {
          // If greater than 200, display in two columns
          var _children = <Widget>[];
          for (var i = 0; i < children.length; i += 2) {
            if (i + 1 < children.length) {
              _children.add(Row(
                children: [children[i], children[i + 1]],
                mainAxisSize: MainAxisSize.min,
              ));
            } else {
              _children.add(children[i]);
            }
          }
          return Column(children: _children, mainAxisSize: MainAxisSize.min);
        }
      },
    );
  }
}

class LayoutBuilderRoute extends StatelessWidget {
  const LayoutBuilderRoute({Key? key}) : super(key: key);

  @override
  Widget build(BuildContext context) {
    var _children = List.filled(6, Text("A"));
    // The maximum width of Column in this example is the width of the screen
    return Column(
      children: [
        // Restrict width to 190, less than 200
        SizedBox(width: 190, child: ResponsiveColumn(children: _children)),
        ResponsiveColumn(children: _children),
        LayoutLogPrint(child: Text("xx")) // To be introduced below
      ],
    );
  }
}
As we can see, using LayoutBuilder is quite simple, but don't underestimate its importance as it is very practical and has two main use cases:
LayoutBuildercan be used to create responsive layouts based on the device's size.LayoutBuildercan help us efficiently troubleshoot issues. For example, when we encounter layout problems or want to debug the layout constraints of a specific node in the component tree,LayoutBuilderis very useful.
# Print Layout Constraints Information
To facilitate debugging, we encapsulate a component that can print the constraints passed from the parent component to its child:
class LayoutLogPrint<T> extends StatelessWidget {
  const LayoutLogPrint({
    Key? key,
    this.tag,
    required this.child,
  }) : super(key: key);

  final Widget child;
  final T? tag; // Specify a log tag

  @override
  Widget build(BuildContext context) {
    return LayoutBuilder(builder: (_, constraints) {
      // assert will be removed in the release version
      assert(() {
        print('${tag ?? key ?? child}: $constraints');
        return true;
      }());
      return child;
    });
  }
}
Now we can use LayoutLogPrint to log the constraints information at any position in the component tree, for example:
LayoutLogPrint(child: Text("xx"))Console output:
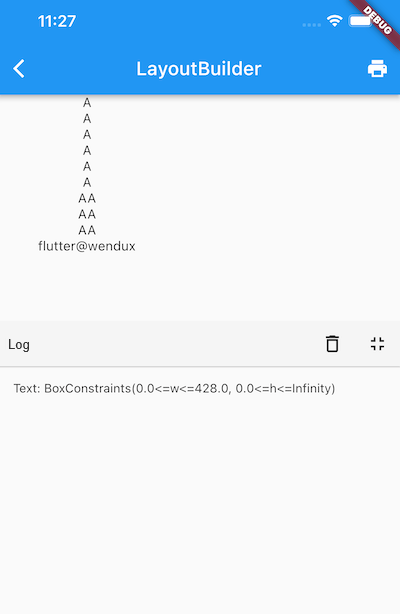
flutter: Text("xx"): BoxConstraints(0.0<=w<=428.0, 0.0<=h<=823.0)We can see that the maximum width of Text("xx") is 428, and the maximum height is 823.
Note! The premise is that we are using box model layout. If it is a Sliver layout, we can use SliverLayoutBuilder to print.
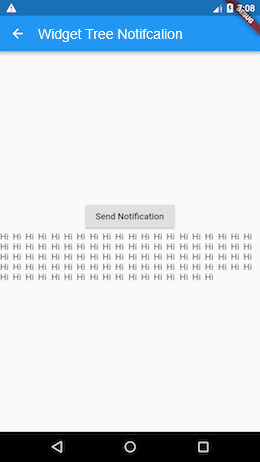
The complete example runs and looks like Figure :
29.2 AfterLayout
1. Get Component Size and Position Relative to the Screen
Flutter is a reactive UI framework, which differs from imperative UI frameworks in that, in most cases, developers only need to focus on data changes. After data changes, the framework automatically rebuilds the UI without the need for developers to manually manipulate every component. Therefore, we find that widgets are defined as immutable and do not provide any APIs for manipulating components. As a result, if we want to get the size and position of a component in Flutter, it can be quite difficult. Of course, in most cases, this may not be needed, but there are scenarios where it is required, which is not an issue in imperative UI frameworks.
We know that a component's size and position can only be determined once the layout is complete, so the timing for obtaining this information must be after the layout is finished. At least, event dispatch occurs after the layout is complete. For example:
Builder(
  builder: (context) {
    return GestureDetector(
      child: Text('flutter@wendux'),
      onTap: () => print(context.size), // Print the size of the text
    );
  },
),
context.size can retrieve the size of the current context's RenderObject. For components like Builder, StatelessWidget, and StatefulWidget, which do not have a corresponding RenderObject (as these components are just for composing and proxying other components without layout and drawing logic), what we get is the RenderObject of the first descendant that has a RenderObject.
Although the size can be obtained when an event is clicked, there are two problems: first, it requires the user to manually trigger it, and second, the timing is too late. More often, we prefer to get size and position information immediately after the layout is finished. To solve this problem, I have encapsulated a component called AfterLayout, which can execute a callback after the child component's layout is complete and pass the RenderObject as a parameter.
Note: AfterLayout is a custom component and is not included in the Flutter component library. Readers can check the implementation source code and examples in the accompanying code. This section mainly discusses its functionality; we will introduce the implementation principles of AfterLayout in later chapters related to layout principles.
Example:
AfterLayout(
  callback: (RenderAfterLayout ral) {
    print(ral.size); // Size of the child component
    print(ral.offset); // Coordinates of the child component on the screen
  },
  child: Text('flutter@wendux'),
),
Console output after running:
flutter: Size(105.0, 17.0)
flutter: Offset(42.5, 290.0)
We can see that the actual length of the Text is 105, the height is 17, and its starting position coordinates are (42.5, 290.0).
2. Get Component Coordinates Relative to a Parent Component
RenderAfterLayout class inherits from RenderBox, and RenderBox has a localToGlobal method that can convert coordinates to those relative to a specified ancestor node. For example, the following code can print the coordinates of Text('A') within the parent Container:
Builder(builder: (context) {
  return Container(
    color: Colors.grey.shade200,
    alignment: Alignment.center,
    width: 100,
    height: 100,
    child: AfterLayout(
      callback: (RenderAfterLayout ral) {
        Offset offset = ral.localToGlobal(
          Offset.zero,
          // Pass a parent element
          ancestor: context.findRenderObject(),
        );
        print('A occupies the space in the Container: ${offset & ral.size}');
      },
      child: Text('A'),
    ),
  );
}),
3. AfterLayout Instance
Next, let's look at a test example of AfterLayout:
class AfterLayoutRoute extends StatefulWidget {
  const AfterLayoutRoute({Key? key}) : super(key: key);

  @override
  _AfterLayoutRouteState createState() => _AfterLayoutRouteState();
}

class _AfterLayoutRouteState extends State<AfterLayoutRoute> {
  String _text = 'Flutter Practical Guide ';
  Size _size = Size.zero;

  @override
  Widget build(BuildContext context) {
    return Column(
      mainAxisSize: MainAxisSize.min,
      children: [
        Padding(
          padding: const EdgeInsets.all(8.0),
          child: Builder(
            builder: (context) {
              return GestureDetector(
                child: Text(
                  'Text1: Tap me to get my size',
                  textAlign: TextAlign.center,
                  style: TextStyle(color: Colors.blue),
                ),
                onTap: () => print('Text1: ${context.size}'),
              );
            },
          ),
        ),
        AfterLayout(
          callback: (RenderAfterLayout ral) {
            print('Text2: ${ral.size}, ${ral.offset}');
          },
          child: Text('Text2: flutter@wendux'),
        ),
        Builder(builder: (context) {
          return Container(
            color: Colors.grey.shade200,
            alignment: Alignment.center,
            width: 100,
            height: 100,
            child: AfterLayout(
              callback: (RenderAfterLayout ral) {
                Offset offset = ral.localToGlobal(
                  Offset.zero,
                  ancestor: context.findRenderObject(),
                );
                print('A occupies the space in the Container: ${offset & ral.size}');
              },
              child: Text('A'),
            ),
          );
        }),
        Divider(),
        AfterLayout(
          child: Text(_text),
          callback: (RenderAfterLayout value) {
            setState(() {
              // Update size information
              _size = value.size;
            });
          },
        ),
        // Display the size of the above Text
        Padding(
          padding: const EdgeInsets.symmetric(vertical: 8.0),
          child: Text(
            'Text size: $_size ',
            style: TextStyle(color: Colors.blue),
          ),
        ),
        ElevatedButton(
          onPressed: () {
            setState(() {
              _text += 'Flutter Practical Guide ';
            });
          },
          child: Text('Add String'),
        ),
      ],
    );
  }
}
After running, the effect is shown in Figure :
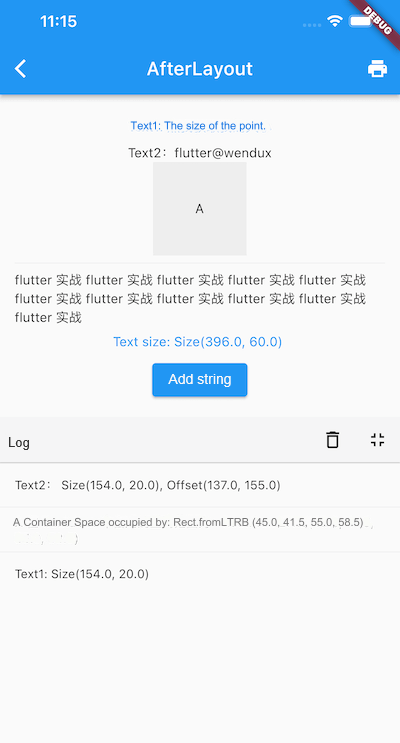
When you click on Text1, you can see its size in the log panel. Clicking the “Add String” button will change the size of the text area displayed on the screen (next to the button) after the string size changes.
29.3 Flutter's Build and Layout
By observing the example of LayoutBuilder, we can also conclude something about Flutter's build and layout: Flutter’s build and layout can be interleaved during execution and do not strictly follow the order of build first and then layout. For example, in the previous case, when encountering the LayoutBuilder component during the build process, the builder of LayoutBuilder is executed in the layout phase (constraints information from the layout process can only be accessed during the layout phase). After creating a new widget in the builder, the Flutter framework will subsequently call that widget's build method, entering the build phase again.
