Theoretically, you can use any text editor and command-line tools to build Flutter applications. However, Flutter officially recommends using either Android Studio or VS Code for a better development experience. Flutter provides plugins for both of these editors, which offer features like code completion, syntax highlighting, widget editing assistance, and support for running and debugging. These features significantly improve development efficiency. Below, we introduce how to configure and use Android Studio and VS Code. (You can find the latest installation instructions for Android Studio and VS Code on their official websites, so we won’t go into the installation process here, as it is relatively simple.)
1. Configuring and Using Android Studio
Since Android Studio is based on IntelliJ IDEA, you can also use IntelliJ IDEA if you prefer.
1) Installing Flutter and Dart Plugins
You need to install two plugins:
-
Flutter plugin: Supports Flutter development workflow (running, debugging, hot reload, etc.).
-
Dart plugin: Provides code analysis (code validation, completion, etc.).
Installation steps:
-
Launch Android Studio.
-
Open the plugin preferences (macOS: Preferences > Plugins, Windows: File > Settings > Plugins).
-
Select Browse repositories…, choose the Flutter plugin, and click Install.
-
Restart Android Studio to activate the plugins.
Next, let's create a Flutter project using Android Studio, run it, and experience "hot reload."
2) Creating a Flutter Application
-
Select File > New Flutter Project.
-
Choose Flutter application as the project type, then click Next.
-
Enter a project name (e.g.,
myapp), then click Next. -
Click Finish.
-
Wait for Android Studio to install the SDK and create the project.
This command creates a Flutter project named myapp, which includes a simple demo application using Material components (opens new window).
In the project directory, the code for your application is located in lib/main.dart.
3) Running the Application
Locate the Android Studio toolbar, as shown in Figure

In the target selector, choose an Android device to run the app. If none is listed, go to Tools > Android > AVD Manager and create one there.
Click the Run icon in the toolbar.
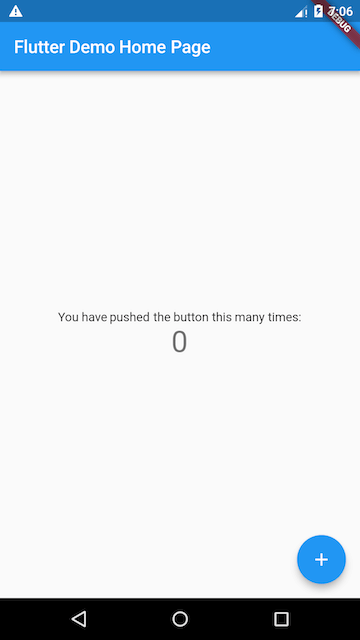
If everything is working correctly, you should see the application running on your device or emulator, as shown in Figure 1-3:
4) Experiencing Hot Reload
Flutter supports fast development cycles through Hot Reload, which allows you to load modified code in real-time without restarting the app, preserving its state. Simply make changes to the code and instruct the IDE or command-line tool to reload (click the reload button), and you will see the changes immediately on your device or emulator.
-
Open the
lib/main.dartfile. -
Change the string
'You have pushed the button this many times:'to'You have clicked the button this many times:'. -
Do not press the "Stop" button; let the app continue running.
-
To see the changes, call Save (cmd-s / ctrl-s), or click the Hot Reload button (the one with the lightning ⚡️ icon).
You will instantly see the updated string in the running application.
2. Configuring and Using VS Code
VS Code is a lightweight editor that supports Flutter running and debugging.
1) Installing the Flutter Plugin
-
Launch VS Code.
-
Open View > Command Palette….
-
Type
install, then select Extensions: Install Extension. -
In the search box, type
flutter, select Flutter from the list, and click Install. -
Select OK to restart VS Code.
Verifying the Configuration
-
Open View > Command Palette….
-
Type
doctor, then select Flutter: Run Flutter Doctor. -
Check the "OUTPUT" window to ensure there are no issues.
2) Creating a Flutter Application
-
Launch VS Code.
-
Open View > Command Palette….
-
Type
flutter, then select Flutter: New Project. -
Enter the project name (e.g.,
myapp), then press Enter. -
Specify the location to place the project, then press the blue OK button.
-
Wait for the project to be created and the
main.dartfile to appear.
3) Experiencing Hot Reload
-
Open the
lib/main.dartfile. -
Change the string
'You have pushed the button this many times:'to'You have clicked the button this many times:'. -
Do not press the "Stop" button; let the app continue running.
-
To see your changes, simply save (cmd-s / ctrl-s), or click the Hot Reload button (the green circular arrow button).
You will instantly see the updated string in the running application.
