Since React released version 18 (referred to as v18) in June 2022, nearly two years have passed. Many developers have experienced the new features brought by v18, with the most eye-catching being the Concurrent Mode. As long as we render our application using the
createRoot()method, we can experience the extreme smoothness that Concurrent Mode offers. At the core of supporting Concurrent Mode is the scheduling engine in React's execution flow — Scheduler.
Scheduling is not a new term. In the computer industry, from operating systems to browsers, and even in large-scale application layers, there is a need for task scheduling. The essence of scheduling is determining how to execute multiple independent tasks at reasonable times. Today, we are studying Scheduler, exploring how it schedules the tasks produced by React.
The exciting part is that Scheduler is a standalone package, meaning it can be used independently in any other library outside of React. What's even more impressive is that the entire source code is only about 600 lines. Understanding Scheduler before diving deep into React is a great choice, as you can grasp it without having to wade through React's complex execution flow. This article attempts to analyze Scheduler from a source-code-level perspective, laying a solid foundation for a deeper understanding of React. By the end of this article, you may find answers to the following questions:
-
Why do we need Scheduler, and what problems does it solve?
-
What are priorities in Scheduler?
-
What data structures does Scheduler use to maintain tasks?
-
How does Scheduler split tasks?
-
What is Scheduler's execution flow?
-
And much more...
Let’s dive in!
1. Concepts
Why do we need Scheduler?
Why do we need a scheduler?
First, it solves the issue of jank (lagging). This comes from a fundamental limitation: the JavaScript engine and rendering are executed on the same thread, and they are mutually exclusive. To ensure smooth user interactions without lag, the screen needs to maintain a refresh rate of 60 frames per second (fps). However, React can generate CPU-intensive tasks like diffing thousands of virtual DOM nodes, which can block the browser's rendering and lead to page lag.
Second, React generates tasks with different priorities. High-priority tasks may be generated later, so lower-priority tasks need to be interruptible, allowing high-priority tasks to execute first. This improves user experience by responding better to actions like clicks and mouse movements.
These are the reasons why React needs a scheduler!
Problems Solved
In React’s execution flow, many tasks are generated. These tasks vary in execution time and priority. They are all handed over to Scheduler for handling. Scheduler has its own mechanism for determining how to execute these tasks at the right time, helping address CPU-intensive and IO-intensive scenarios.
2. Hands-On Experience
As mentioned earlier, Scheduler can be used independently. Rather than discussing it theoretically, let’s create a project and try it out ourselves:
npm init
npm i scheduler -S
Scheduler exposes many methods, but the most important one is unstable_scheduleCallback, which schedules a task based on a certain priority.
// test.js
const { unstable_scheduleCallback } = require("scheduler");

const tasks = [1, 1, 2, 2, 3, 3, 4, 4, 1, 2, 3, 4, 1, 2, 3, 4, 3, 2, 1, 1, 1, 1, 1];

tasks.forEach((priority, i) => {
  unstable_scheduleCallback(priority, () => {
    console.log(priority, `Task ${i}`);
  });
});

console.log("script!");

Promise.resolve().then(() => console.log("Microtask after script"));
In the above code, tasks with different priorities (the lower the value, the higher the priority) are handed over to Scheduler for scheduling. We also test the asynchronous execution timing of the scheduler.
From the result, we can conclude that Scheduler executes tasks in order of priority, with higher-priority tasks being executed first. If tasks have the same priority, they are executed in the order they were registered. Also, tasks handed over to Scheduler are executed asynchronously in the next macro task. (We will explore in the source code whether every task is executed in the next macro task—let’s leave that as a question for now!)
Scheduler exposes several methods for users, with
unstable_scheduleCallbackallowing task scheduling according to priority, ensuring that higher-priority tasks are executed first.
3. Source Code
Next, let's dive into the source code. Don’t worry, I'll filter out the less important details and focus on the core concepts to help everyone understand the key parts. However, after reading this article, I suggest you take a closer look at the source code for a more profound understanding and to validate whether my interpretation aligns with your own.
Min-Heap
Those familiar with algorithms and data structures will know this structure well. A min-heap is essentially a binary tree where the root always holds the minimum value (in the context of business logic, this corresponds to the task with the highest priority). The min-heap exposes three main methods: adding an element to the heap, removing the root element, and retrieving the root element.
The detailed implementation is here, but if you're interested in diving deeper, stay tuned to this column. I'll later release an article discussing algorithms within React. For now, you can treat it as a black box.
JavaScript Code Explanation
// Comparison strategy
function compare(a, b) {
  // Use the sortIndex of the node as the basis for comparison. If comparison is not possible, use the ID (task order).
  var diff = a.sortIndex - b.sortIndex;
  return diff !== 0 ? diff : a.id - b.id;
}
The Scheduler uses the above comparison strategy to maintain the root element of the heap.
Priority Levels
In the Scheduler, there are five types of priority levels:
var ImmediatePriority = 1;
var UserBlockingPriority = 2;
var NormalPriority = 3;
var LowPriority = 4;
var IdlePriority = 5;
Each priority level corresponds to a specific timeout duration:
var IMMEDIATE_PRIORITY_TIMEOUT = -1;
var USER_BLOCKING_PRIORITY_TIMEOUT = 250;
var NORMAL_PRIORITY_TIMEOUT = 5000;
var LOW_PRIORITY_TIMEOUT = 10000;
var maxSigned31BitInt = 1073741823;
Entry Point
First, let's familiarize ourselves with several important global variables:
var taskQueue = []; // Task queue
var timerQueue = []; // Delayed task queue

var taskIdCounter = 1; // Task ID counter
var currentTask = null; // The task currently being executed
var currentPriorityLevel = NormalPriority; // The current priority level of the task

var isPerformingWork = false; // Indicates whether flushWork is being executed
var isHostCallbackScheduled = false; // Indicates if a task is scheduled
var isHostTimeoutScheduled = false; // Indicates if a timer is set to schedule delayed tasks
Both taskQueue and timerQueue are essentially min-heaps, but they are implemented using arrays. Next, let's look at the entry function:
function unstable_scheduleCallback(priorityLevel, callback, options) {
  var currentTime = exports.unstable_now(); // Get the current time
  var startTime;

  if (typeof options === 'object' && options !== null) {
    ...
  } else {
    startTime = currentTime;
  }

  var timeout;

  switch (priorityLevel) {
    case ImmediatePriority:
      timeout = IMMEDIATE_PRIORITY_TIMEOUT; // -1
      break;
    case UserBlockingPriority:
      timeout = USER_BLOCKING_PRIORITY_TIMEOUT; // 250
      break;
    case IdlePriority:
      timeout = IDLE_PRIORITY_TIMEOUT; // 12 days, a very large number
      break;
    case LowPriority:
      timeout = LOW_PRIORITY_TIMEOUT; // 10000 ms
      break;
    case NormalPriority:
    default:
      timeout = NORMAL_PRIORITY_TIMEOUT; // 5000 ms
      break;
  }

  var expirationTime = startTime + timeout;
  var newTask = {
    id: taskIdCounter++,
    callback: callback,
    priorityLevel: priorityLevel,
    startTime: startTime,
    expirationTime: expirationTime,
    sortIndex: -1
  };

  if (startTime > currentTime) {
    ...
  } else {
    newTask.sortIndex = expirationTime; // sortIndex is essentially the expiration time. The earlier the expiration (lower value), the sooner it will be executed.
    push(taskQueue, newTask); // Push into taskQueue
    if (!isHostCallbackScheduled && !isPerformingWork) {
      // The first task will go through here since by default, no task is scheduled or being executed.
      isHostCallbackScheduled = true;
      requestHostCallback(flushWork);
    }
  }

  return newTask;
}
The above code is straightforward and essentially does three things:
-
Creates a task object with the available information.
-
Adds the task to the min-heap.
-
If it's the first task, it triggers
requestHostCallback(flushWork)to schedule execution.
How Scheduling Works
What does requestHostCallback do?
function requestHostCallback(callback) {
  scheduledHostCallback = callback; // Essentially points to flushWork.

  if (!isMessageLoopRunning) { // Indicates whether a macro task is running.
    isMessageLoopRunning = true; // If not, wake up the next macro task.
    schedulePerformWorkUntilDeadline();
  }
}
When the first task is added to the Scheduler, no macro tasks are running, so let's see what happens in schedulePerformWorkUntilDeadline:
schedulePerformWorkUntilDeadline = function () {
    port.postMessage(null);
};
The Scheduler uses several patches to implement schedulePerformWorkUntilDeadline, but modern browsers typically support MessageChannel. Using it triggers the callback registered on another port in the next macro task. This is done via:
channel.port1.onmessage = performWorkUntilDeadline;
var performWorkUntilDeadline = function () {
  if (scheduledHostCallback !== null) {
    var currentTime = exports.unstable_now(); // Get the current time
    startTime = currentTime; // Global startTime to track the scheduling start time of this batch of tasks, used to determine whether the slice is exhausted.
    var hasTimeRemaining = true; // Always true.
    var hasMoreWork = true;
    try {
      hasMoreWork = scheduledHostCallback(hasTimeRemaining, currentTime); // Executes flushWork.
    } finally {
      if (hasMoreWork) {
        schedulePerformWorkUntilDeadline(); // If tasks remain, continue scheduling in the next macro task.
      } else {
        // If the queue is empty, clear the global variables.
        isMessageLoopRunning = false;
        scheduledHostCallback = null;
      }
    }
  } else {
    isMessageLoopRunning = false;
  }
};
The function performWorkUntilDeadline essentially executes flushWork. Let's look at what flushWork does:
function flushWork(hasTimeRemaining, initialTime) {
  isHostCallbackScheduled = false;
  isPerformingWork = true;
  var previousPriorityLevel = currentPriorityLevel;
  try {
    ...
    return workLoop(hasTimeRemaining, initialTime);
  } finally {
    currentTask = null;
    currentPriorityLevel = previousPriorityLevel;
    isPerformingWork = false;
  }
}
flushWork simply calls workLoop, which is the core of the scheduling process:
function workLoop(hasTimeRemaining, initialTime) {
  var currentTime = initialTime;
  currentTask = peek(taskQueue);
  while (currentTask !== null) {
    if (currentTask.expirationTime > currentTime && (!hasTimeRemaining || shouldYieldToHost())) {
      break;
    }

    var callback = currentTask.callback;

    if (typeof callback === 'function') {
      currentTask.callback = null;
      currentPriorityLevel = currentTask.priorityLevel;
      var didUserCallbackTimeout = currentTask.expirationTime <= currentTime;
      var continuationCallback = callback(didUserCallbackTimeout);
      currentTime = exports.unstable_now();

      if (typeof continuationCallback === 'function') {
        currentTask.callback = continuationCallback;
      } else {
        if (currentTask === peek(taskQueue)) {
          pop(taskQueue);
        }
      }

      ...
    } else {
      pop(taskQueue);
    }

    currentTask = peek(taskQueue);
  }

  if (currentTask !== null) {
    return true;
  }
  return false;
}
This function is the core logic of the Scheduler, and we’ll break it down step by step.
When the execution flow enters workLoop, it means we are in the next macro task.
At this point, based on our earlier analysis, several tasks should have already been registered in the heap, sorted by priority.
Small Tasks
The Scheduler does not adopt the strategy of completing only one task per macro task because that would result in poor performance. Some tasks are short, and reserving a large block of a macro task to complete just one small task would be inefficient. Therefore, the Scheduler merges small tasks into a single macro task, completing them together. This is done by using a while loop to sequentially fetch tasks from the taskQueue and execute them.
When encountering small tasks, the Scheduler executes them within the same time slice until their cumulative execution time exceeds a set threshold, after which it yields the main thread. In the Scheduler, this threshold is 5ms, as seen in the source code.
var frameYieldMs = 5; // Slice size
The method to check this is shouldYieldToHost.
var frameInterval = frameYieldMs;
function shouldYieldToHost() {
  var timeElapsed = exports.unstable_now() - startTime;
  if (timeElapsed < frameInterval) {
    return false; // The time slice is not over yet, no need to yield
  }
  return true; // Time slice is over, yield the main thread
}
Since we know when the current batch of tasks began, as soon as the accumulated time exceeds 5ms, the main thread is yielded, breaking the while loop. If there are still tasks in the taskQueue, the function returns true; otherwise, it returns false. This determines whether performWorkUntilDeadline should continue scheduling tasks (you can review the previous analysis), clearing the queue until it's empty. Throughout this process, tasks are completed asynchronously within the macro task, without blocking the main thread's UI rendering, ensuring that the user does not experience lag.
Large Tasks
Not all tasks are small. Some can be large and may far exceed the 5ms threshold. What happens then?
There are two possibilities. The first is that the user ignores this and lets the Scheduler handle the large task. As a result, the workLoop might take a significant amount of time to complete this task, breaking the while loop after its completion. The next task will be scheduled in the next macro task, but the UI rendering will be blocked during the execution of the large task, negatively impacting the user experience.
The second possibility is that the user leverages the Scheduler's shouldYieldToHost method to split the large task into smaller ones, allowing them to be executed without blocking the UI, thus ensuring a smoother user experience. How is this done?
Users need to design the execution of large tasks in a way that divides them into smaller units. For example, a synchronous large task can be split into multiple small independent tasks executed in a loop. This can be achieved with a pattern like this:
let current = 0;
let count = 100000;
const bigWork = () => {
    while (current < count && !shouldYieldToHost()) {
        doUnitWork();
        count++;
    }

    if (current < count) {
      // Task not completed, but the time slice has ended
      return bigWork;
    }

    return null;
}
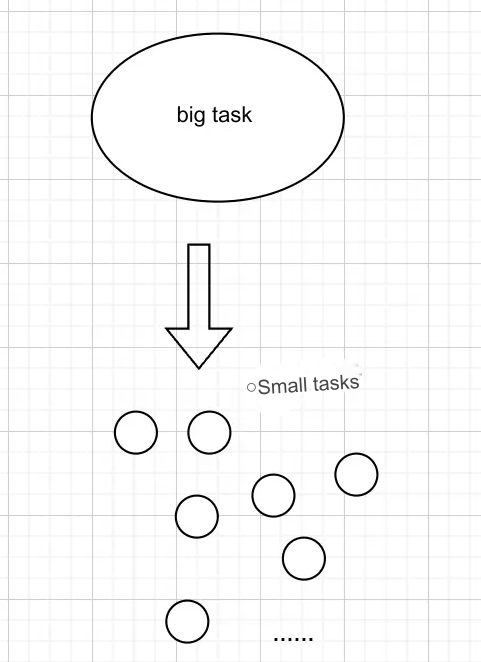
The user modifies the large task using this pattern, splitting it into finer-grained small tasks. After each small task, the Scheduler checks if the 5ms time slice is used up. If so, execution stops. Even though the large task may not be completed, its progress is saved in global variables, ensuring no information is lost. The function returns itself, and the Scheduler continues handling this scenario.
// Inside the workLoop function
var continuationCallback = callback(didUserCallbackTimeout); // After execution
currentTime = getCurrentTime();
if (typeof continuationCallback === "function") {
  currentTask.callback = continuationCallback;
} else {
  if (currentTask === peek(taskQueue)) {
    pop(taskQueue);
  }
}
When a function returns a function, the currentTask is reassigned, and importantly, the task is not removed from the taskQueue. The next macro task will continue scheduling it. The task at the top of the stack remains the same, and global variables store the execution progress, allowing it to resume without blocking the UI.
In fact, React's concurrent mode uses this approach to update large tasks, as shown below:
function workLoopConcurrent() {
    // Perform work until Scheduler asks us to yield
    while (workInProgress !== null && !shouldYield()) {
      performUnitOfWork(workInProgress); // Process each fiber node
    }
}
Summary
From the above content, we understand the workLoop process. The core principle of the Scheduler's scheduling process is to execute as many tasks as possible without blocking browser rendering. If the tasks are small (short in duration), they are grouped and executed in batches. If the tasks are large, users can collaborate with the Scheduler to break them down into smaller tasks for phased execution. Overall, the Scheduler ensures tasks are executed as soon as possible based on priority, without hindering UI rendering.
Starvation Problem
In task scheduling, there is always a starvation issue. This means that when the scheduler receives a batch of tasks, they are arranged by priority. If new tasks keep being added and the highest-priority tasks always have higher priority than the others, lower-priority tasks may never get executed, much like someone constantly cutting in line.
How does the Scheduler solve this?
As mentioned earlier, the Scheduler uses a min-heap to maintain the priority queue. Let's take a look at the queueing code:
// Simplified code
function unstable_scheduleCallback(priorityLevel, callback, options) {
  ...
  var startTime = exports.unstable_now();
  var timeout = determined by priority // -1 | 250 | 1000 | 5000 | 12 days
  var expirationTime = startTime + timeout;
  var newTask = {
    id: taskIdCounter++,
    callback: callback,
    priorityLevel: priorityLevel,
    startTime: startTime,
    expirationTime: expirationTime,
    sortIndex: -1
  };

  newTask.sortIndex = expirationTime;
  push(taskQueue, newTask);
  ...

  return newTask;
}
The key to determining whether a task remains at the top of the heap is sortIndex, which depends on expirationTime. This is composed of two parts: startTime and timeout. As time progresses, the priority of lower-priority tasks increases, because their startTime is earlier. Even though newer tasks may have higher priority, their startTime will be later, giving older tasks a chance to move up the priority queue.
When a task's expiration time is reached, it will definitely be at the top of the heap, and no new task can surpass it, regardless of its priority.
Summary
In the Scheduler, task priorities are not static; they dynamically adjust during the scheduling process.
Conclusion
The Scheduler actually maintains two queues. This article did not touch on the timerQueue because it is not typically involved in React’s scheduling process. For understanding React, the knowledge above is sufficient. Information about the timerQueue will be covered in a future article.

