In a Flutter app, the installation package contains both code and assets. Assets are resources that are bundled into the installation package and can be accessed at runtime. Common asset types include static data (e.g., JSON files), configuration files, icons, and images.
13.1 Specifying Assets
Like package management, Flutter uses the pubspec.yaml file to manage assets required by the application. For example:
flutter:
  assets:
    - assets/my_icon.png
    - assets/background.png
The assets section specifies the files to include in the application. Each asset is identified by a file system path relative to the pubspec.yaml file. The actual folder can be any directory, but in this example, it's the assets folder.
During the build process, Flutter places assets into a special archive called an asset bundle, which the app can read at runtime but cannot modify.
13.2 Asset Variants
The build process supports the concept of asset variants, meaning different versions of the same asset may appear in various contexts. When you specify the asset path in the pubspec.yaml file, the build process looks for files with the same name in adjacent subdirectories. These files are then included alongside the specified asset in the asset bundle.
For example, if the app directory has the following files:
…/pubspec.yaml
…/graphics/my_icon.png
…/graphics/background.png
…/graphics/dark/background.png
You only need to include the following in pubspec.yaml:
flutter:
  assets:
    - graphics/background.png
Both graphics/background.png and graphics/dark/background.png will be included in the asset bundle. The former is considered the main asset, while the latter is a variant.
Flutter uses asset variants when selecting images that match the device's resolution.
13.3 Loading Assets
Your app can access its assets using the AssetBundle object. There are two primary methods to load string or binary (image) files from the asset bundle.
1. Loading Text Assets
Using
rootBundle: Each Flutter app has arootBundleobject that provides easy access to the main asset bundle. Thepackage:flutter/services.dartlibrary offers a global, staticrootBundleobject to load assets directly.Using
DefaultAssetBundle: It's recommended to useDefaultAssetBundleto get the asset bundle of the currentBuildContext. This allows you to dynamically replace the default asset bundle during runtime, which is useful for localization or testing.
You can typically load assets indirectly at runtime using DefaultAssetBundle.of(), or directly use rootBundle when outside the widget context, such as:
import 'dart:async' show Future;
import 'package:flutter/services.dart' show rootBundle;

Future<String> loadAsset() async {
  return await rootBundle.loadString('assets/config.json');
}
2. Loading Images
Like in native development, Flutter can load images that match the resolution of the current device.
1) Declaring Resolution-Specific Image Assets
AssetImage can map asset requests to the closest match for the device's pixel ratio (dpi). To enable this mapping, assets must follow a specific directory structure:
…/image.png
…/Mx/image.png
…/Nx/image.png
Here, M and N are numeric identifiers that specify the resolution of the images. The base asset corresponds to a resolution of 1.0x. For example:
…/my_icon.png
…/2.0x/my_icon.png
…/3.0x/my_icon.png
For a device with a pixel ratio of 1.8, .../2.0x/my_icon.png will be selected, while for a pixel ratio of 2.7, .../3.0x/my_icon.png will be chosen.
If no width or height is specified in the Image widget, the image will render at the size of the base asset. For example, if my_icon.png is 72x72px, then 3.0x/my_icon.png should be 216x216px but will still render as 72x72 pixels if no size is set.
Each item in the pubspec.yaml assets section should correspond to the actual file, except for the main resource item. If the main resource is missing, Flutter will search the higher resolution assets in ascending order.
2) Loading Images
To load an image, you can use the AssetImage class. For example, loading the background image from the previous asset declaration:
Widget build(BuildContext context) {
  return DecoratedBox(
    decoration: BoxDecoration(
      image: DecorationImage(
        image: AssetImage('graphics/background.png'),
      ),
    ),
  );
}
Note that AssetImage is not a widget; it is an ImageProvider. To directly display the image, use Image.asset():
Widget build(BuildContext context) {
  return Image.asset('graphics/background.png');
}
When loading assets using the default asset bundle, Flutter handles resolution scaling automatically. However, when using lower-level classes like ImageStream or ImageCache, you'll notice parameters related to scaling.
3) Loading Package Assets
To load images from a dependency package, you must provide the package argument to AssetImage.
For example, if your app depends on a package called my_icons, which has the following directory structure:
…/pubspec.yaml
…/icons/heart.png
…/icons/1.5x/heart.png
…/icons/2.0x/heart.png
You can load the image with:
AssetImage('icons/heart.png', package: 'my_icons')Or:
Image.asset('icons/heart.png', package: 'my_icons')When a package uses its own assets, it must also include the package argument to access them.
Packaging Assets in a Dependency
If assets are declared in the pubspec.yaml file, they will be bundled into the package. Especially for package assets, they must be specified in pubspec.yaml. Packages can also include assets in their lib/ folder, but for images to be bundled, the application must declare which ones to include.
For example, a package named fancy_backgrounds might contain the following files:
…/lib/backgrounds/background1.png
…/lib/backgrounds/background2.png
…/lib/backgrounds/background3.png
To include background1.png, the following must be added to the application's pubspec.yaml file:
flutter:
  assets:
    - packages/fancy_backgrounds/backgrounds/background1.png
The lib/ directory is implicit, so it should not be included in the asset path.
13.4 Platform-Specific Assets
These assets can only be used once the Flutter framework is running. However, to set the app's icon or add a splash screen, you need platform-specific assets.
1) Setting the App Icon
Updating the Flutter app icon is similar to the way it's done in native Android or iOS apps.
Android: In the root directory of your Flutter project, navigate to
.../android/app/src/main/res. It contains various resource folders, such asmipmap-hdpi, with a placeholder image (ic_launcher.png). Replace it with the desired resource, adhering to Android's icon size recommendations for different screen densities (dpi).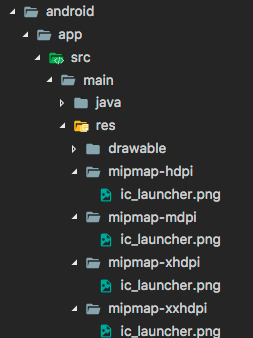
iOS: In the root directory of your Flutter project, navigate to
.../ios/Runner. InsideAssets.xcassets/AppIcon.appiconset, replace the placeholder images with correctly sized images, keeping the original filenames intact.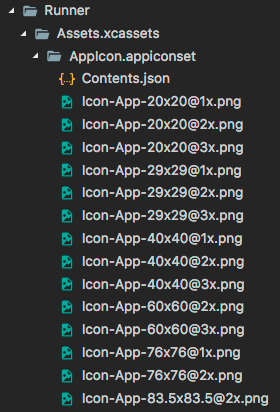
2) Updating the Splash Screen
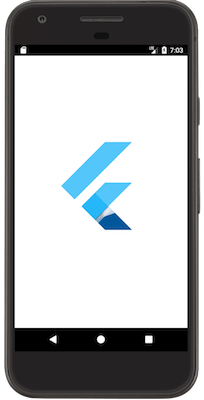
Flutter uses native platform mechanisms to display a splash screen while the framework loads. This splash screen is visible until Flutter renders the first frame of your app.
Android: To add a splash screen, navigate to
.../android/app/src/main. Inres/drawable/launch_background.xml, you can customize the drawable for the splash screen.iOS: Navigate to
.../ios/Runner/Assets.xcassets/LaunchImage.imageset, add the image, and name itLaunchImage.png,LaunchImage@2x.png, orLaunchImage@3x.png.

13.5 Shared Platform Assets
In a hybrid Flutter-native development model, both Flutter and native code might need to use the same assets. For example, if Flutter has an image that the native code also needs, you could duplicate it in the native project’s specific directory, but this would increase the app size. To avoid redundancy, Flutter provides a way for Flutter and native platforms to share resources. Since this requires platform-specific code, readers are encouraged to refer to the official documentation for more details.
