The Dart IO library provides several classes for initiating HTTP requests, and we can directly use HttpClient to make requests. Initiating a request using HttpClient involves five steps:
Create an HttpClient:
HttpClient httpClient = HttpClient();
Open an HTTP connection and set the request headers:
HttpClientRequest request = await httpClient.getUrl(uri);
You can use any HTTP method here, such as
httpClient.post(...),httpClient.delete(...), etc. If there are query parameters, you can add them when constructing the URI, like this:Uri uri = Uri(scheme: "https", host: "flutterchina.club", queryParameters: { "xx": "xx", "yy": "dd" });You can set request headers using
HttpClientRequest, for example:request.headers.add("user-agent", "test");For methods like POST or PUT that can carry a request body, you can send the body through the
HttpClientRequestobject, like so:String payload = "..."; request.add(utf8.encode(payload)); // request.addStream(_inputStream); // You can directly add an input stream
Wait for the connection to the server:
HttpClientResponse response = await request.close();
After this step, the request information has been sent to the server, returning an
HttpClientResponseobject that includes response headers and the response stream (the response body stream). You can then read the response stream to get the response content.Read the response content:
String responseBody = await response.transform(utf8.decoder).join();
We read the response stream to get the data returned by the server. When reading, we can set the encoding format; here it is UTF-8.
End the request and close the HttpClient:
httpClient.close();
After closing the client, all requests initiated by that client will be terminated.
78.1 Example
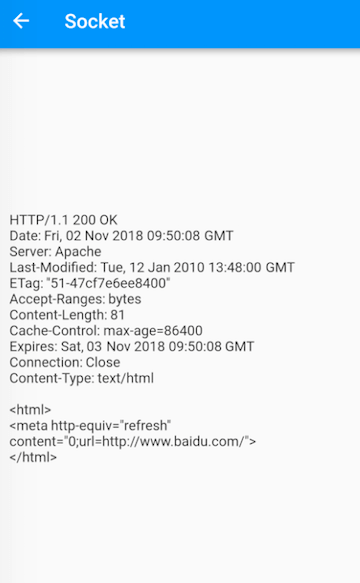
We will implement an example to fetch the HTML of the Baidu homepage, with the expected result shown in Figure:
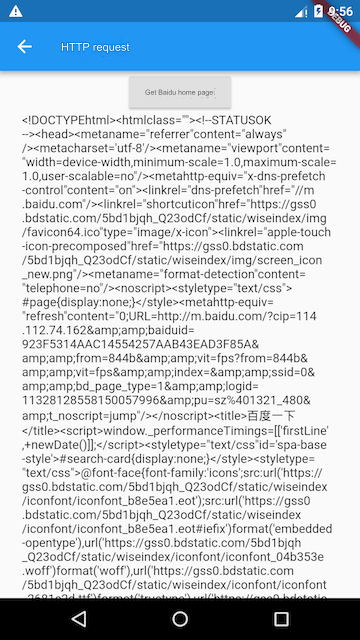
After clicking the "Get Baidu Homepage" button, a request will be made to Baidu's homepage. Upon successful request, we will display the returned content and print the response headers in the console. The code is as follows:
import 'dart:convert';
import 'dart:io';

import 'package:flutter/material.dart';

class HttpTestRoute extends StatefulWidget {
  @override
  _HttpTestRouteState createState() => _HttpTestRouteState();
}

class _HttpTestRouteState extends State<HttpTestRoute> {
  bool _loading = false;
  String _text = "";

  @override
  Widget build(BuildContext context) {
    return SingleChildScrollView(
      child: Column(
        children: <Widget>[
          ElevatedButton(
            child: Text("获取百度首页"),
            onPressed: _loading ? null : request,
          ),
          Container(
            width: MediaQuery.of(context).size.width - 50.0,
            child: Text(_text.replaceAll(RegExp(r"s"), "")),
          )
        ],
      ),
    );
  }

  request() async {
    setState(() {
      _loading = true;
      _text = "正在请求...";
    });
    try {
      // Create an HttpClient
      HttpClient httpClient = HttpClient();
      // Open HTTP connection
      HttpClientRequest request =
          await httpClient.getUrl(Uri.parse("https://www.baidu.com"));
      // Use iPhone's User-Agent
      request.headers.add(
        "user-agent",
        "Mozilla/5.0 (iPhone; CPU iPhone OS 10_3_1 like Mac OS X) AppleWebKit/603.1.30 (KHTML, like Gecko) Version/10.0 Mobile/14E304 Safari/602.1",
      );
      // Wait for connection to server (this sends the request information to the server)
      HttpClientResponse response = await request.close();
      // Read the response content
      _text = await response.transform(utf8.decoder).join();
      // Output response headers
      print(response.headers);

      // After closing the client, all requests initiated by that client will be terminated.
      httpClient.close();
    } catch (e) {
      _text = "请求失败:$e";
    } finally {
      setState(() {
        _loading = false;
      });
    }
  }
}
Console Output:
I/flutter (18545): connection: Keep-Alive
I/flutter (18545): cache-control: no-cache
I/flutter (18545): set-cookie: ....  // Multiple entries, omitted...
I/flutter (18545): transfer-encoding: chunked
I/flutter (18545): date: Tue, 30 Oct 2018 10:00:52 GMT
I/flutter (18545): content-encoding: gzip
I/flutter (18545): vary: Accept-Encoding
I/flutter (18545): strict-transport-security: max-age=172800
I/flutter (18545): content-type: text/html;charset=utf-8
I/flutter (18545): tracecode: 00525262401065761290103018, 00522983
78.2 HttpClient Configuration
HttpClient has many properties that can be configured, with a list of commonly used properties as follows:
| Property | Meaning |
|---|---|
idleTimeout | Corresponds to the keep-alive field value in the request headers. To avoid frequent connection establishment, httpClient will keep the connection open for a period after the request ends, closing it only after exceeding this threshold. |
connectionTimeout | The timeout for establishing a connection to the server; if it exceeds this value, a SocketException will be thrown. |
maxConnectionsPerHost | The maximum number of simultaneous connections allowed for the same host. |
autoUncompress | Corresponds to the Content-Encoding field in the request headers. If set to true, the value of Content-Encoding in the request headers will be the list of compression algorithms supported by the current HttpClient, currently only "gzip". |
userAgent | Corresponds to the User-Agent field in the request headers. |
It can be observed that some properties are merely for easier header settings. For these properties, you can completely set the header directly through HttpClientRequest. The difference is that settings applied via HttpClient affect the entire client, while settings applied via HttpClientRequest only affect the current request.
78.3 HTTP Request Authentication
The HTTP protocol's authentication mechanism can be used to protect non-public resources. If the HTTP server has authentication enabled, users need to provide their credentials when making requests. For example, when accessing a resource with Basic authentication in a browser, a login prompt will appear.
Let's first look at the basic process of Basic authentication:
The client sends an HTTP request to the server. The server checks if the user has been authenticated. If not, it returns a
401 Unauthorizedresponse to the client and adds aWWW-Authenticatefield in the response header, such as:WWW-Authenticate: Basic realm="admin"
Here, "Basic" indicates the authentication method, and
realmis a grouping of user roles that can be added in the backend.Upon receiving the response code, the client encodes the username and password in Base64 (format: username
), sets the
Authorizationrequest header, and continues:Authorization: Basic YXXFISDJFISJFGIJIJG
The server verifies the user credentials; if valid, it returns the resource content.
Note that apart from Basic authentication, HTTP also supports Digest authentication, Client authentication, Form Based authentication, etc. Currently, Flutter's HttpClient only supports Basic and Digest authentication. The main difference between these two is that the former simply encodes user credentials using Base64 (which is reversible), while the latter performs a hash operation, providing a bit more security. However, for safety, both Basic and Digest authentication should be used over HTTPS to prevent eavesdropping and man-in-the-middle attacks.
HttpClient Methods and Properties for HTTP Authentication:
addCredentials(Uri url, String realm, HttpClientCredentials credentials)This method is used to add user credentials, for example:
httpClient.addCredentials(_uri, "admin", HttpClientBasicCredentials("username", "password")); // Basic authentication credentialsFor Digest authentication, you can create Digest credentials:
HttpClientDigestCredentials("username", "password");authenticate(Future<bool> f(Uri url, String scheme, String realm))This is a setter that accepts a callback. When the server requires user credentials that haven't been added yet,
httpClientwill call this callback. Within this callback, you would generally calladdCredential()to dynamically add user credentials, for example:httpClient.authenticate = (Uri url, String scheme, String realm) async { if (url.host == "xx.com" && realm == "admin") { httpClient.addCredentials(url, "admin", HttpClientBasicCredentials("username", "pwd")); return true; } return false; };
A suggestion is that if all requests require authentication, you should call addCredentials() during the HttpClient initialization to add global credentials rather than adding them dynamically.
78.4 Proxy
You can set proxy policies using findProxy. For example, if you want to send all requests through a proxy server (192.168.1.2:8888):
client.findProxy = (uri) {
  // Manually check if filtering the uri is needed
  return "PROXY 192.168.1.2:8888";
};
The return value of the findProxy callback is a string that follows the browser PAC script format. For details, refer to the API documentation. If no proxy is needed, just return "DIRECT".
In app development, we often need to capture packets for debugging, and packet capture software (like Charles) acts as a proxy. In this case, we can send requests to our packet capture software to view the request data.
Sometimes, the proxy server may also require authentication, which is similar to HTTP authentication. HttpClient provides corresponding methods and properties for proxy authentication:
set authenticateProxy(Future<bool> f(String host, int port, String scheme, String realm));void addProxyCredentials(String host, int port, String realm, HttpClientCredentials credentials);
Their usage is the same as the addCredentials and authenticate described in the "HTTP Request Authentication" section, so we won’t elaborate further.
78.5 Certificate Verification
To prevent man-in-the-middle attacks using forged certificates, clients should verify self-signed or non-CA issued certificates in HTTPS. The certificate verification logic for HttpClient is as follows:
If the requested HTTPS certificate is issued by a trusted CA and the accessed host is included in the certificate's domain list (or matches wildcard rules) and the certificate is not expired, verification passes.
If the first verification fails but the certificate has been added to the certificate trust chain using
SecurityContextwhen creating theHttpClient, then if the server's returned certificate is in the trust chain, verification passes.If both verifications fail and the user has provided a
badCertificateCallback, it will be called. If the callback returnstrue, the connection is allowed to continue; if it returnsfalse, the connection is terminated.
In summary, our certificate verification is essentially providing a badCertificateCallback. Here’s an example to illustrate:
Example
Assume our backend service uses a self-signed certificate in PEM format, and we save the certificate's content in a local string. Our verification logic would look like this:
String PEM = "XXXXX"; // Can be read from a file
...
httpClient.badCertificateCallback = (X509Certificate cert, String host, int port) {
  if (cert.pem == PEM) {
    return true; // If the certificate matches, allow data to be sent
  }
  return false;
};
X509Certificate is the standard format for certificates, containing all information except the private key. Readers can refer to the documentation for more details. Additionally, the above example does not verify the host, as the consistency of the server's returned certificate with the locally stored one already proves it is our server (and not a man-in-the-middle). Host verification is generally used to prevent mismatches between certificates and domain names.
For self-signed certificates, we can also add them to the local certificate trust chain, allowing certificate verification to pass automatically without invoking the badCertificateCallback:
SecurityContext sc = SecurityContext();
// file is the certificate path
sc.setTrustedCertificates(file);
// Create an HttpClient
HttpClient httpClient = HttpClient(context: sc);
Note that certificates set using setTrustedCertificates() must be in PEM or PKCS12 format. If the certificate is in PKCS12 format, the password must be passed in, which exposes the certificate password in the code, so using PKCS12 format for client certificate verification is not recommended.
78.6 Summary
This section discussed how to use the Dart
library's HttpClient to initiate HTTP requests, as well as related request configurations, proxy settings, and certificate verification. It can be noted that making network requests directly through HttpClient is somewhat cumbersome. In the next section, we will introduce the Dio networking library, which simplifies this process. It is important to note that most properties and methods provided by HttpClient ultimately affect the request headers, and we could manually set headers to achieve the same result. These methods are provided solely for the convenience of developers. Additionally, the HTTP protocol is a very important and widely used network protocol that every developer should be familiar with.
